You want a brisket that bends like a hammock, smells clean, and shines deep cherry red under the case lights, not gray and sad. I’ll show you how to spot Prime from “please don’t,” chase fine marbling, and judge a fat cap with a quick thumb press. We’ll talk flat vs. point, weight vs. cook time, and trims that save—or cost—you. Ready to shop like you brought a thermometer to a knife fight?
Understand Brisket Anatomy: Flat vs. Point

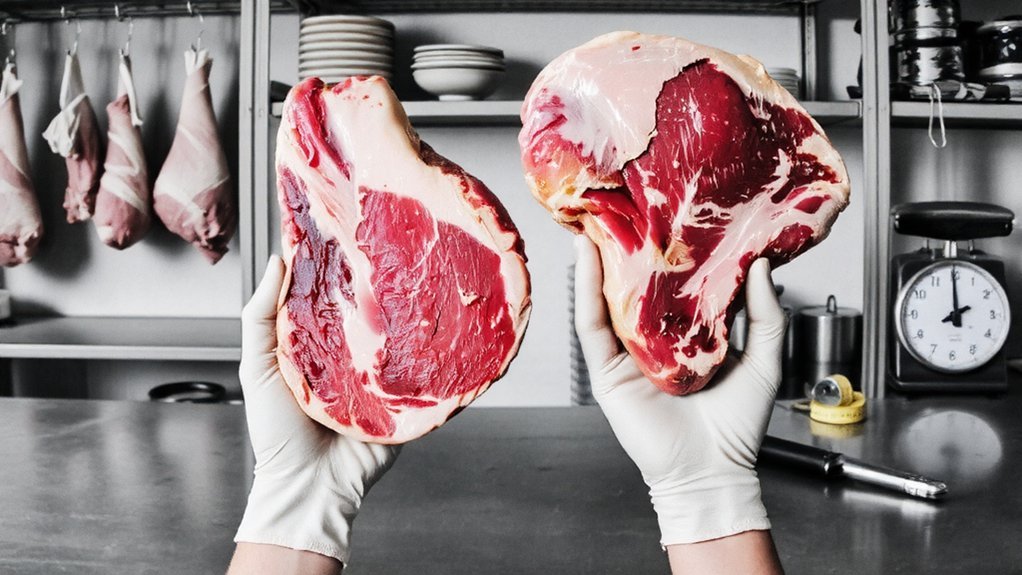
Maps matter. You’re choosing brisket types like a navigator, and I’m your slightly overcaffeinated tour guide. Start with cut origins: the brisket sits on the chest, a hardworking muscle, two distinct neighborhoods. The flat, long and even, slices clean, leans toward firm, shines in neat sandwiches at the church fundraiser. The point, squat and marbled, feels bumpy, renders slowly, drips with buttery juice, perfect when you want burn ends that make folks close their eyes. Run your fingers along the grain—straight on the flat, wild on the point. Lift the packer, feel the bend, imagine the sizzle. Need precision? Trim the deckle, expose seams, follow natural lines like a map’s contour. You’ll serve joy, not just meat.
Choose the Right Grade: Prime, Choice, and Select
Choice is the crowd-pleaser. Solid balance, dependable juiciness, friendlier price. It forgives a busy schedule and still plates like you meant it. Select, meanwhile, is leaner and budget-smart. It’s clean, mild, and better when you cook gently and season with intention.
Those are the core grading differences. Match the grade to your purpose: celebration, everyday hospitality, or thrifty volume. Choose boldly, serve joyfully.
Assess Marbling for Flavor and Moisture
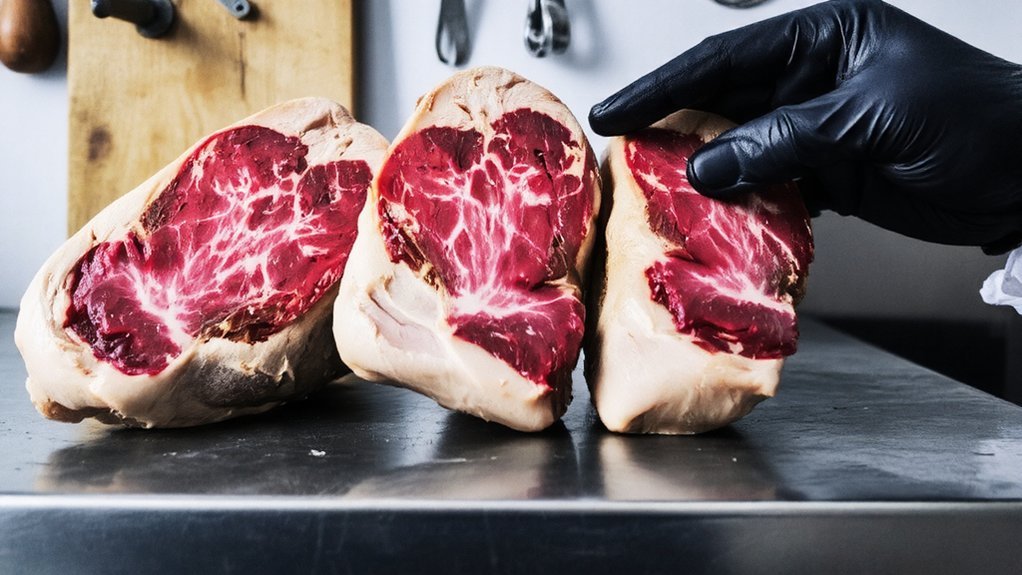
You want marbling that looks like fine white freckles, tiny streaks weaving through the meat, not big chalky blotches. Scan for even fat distribution across the flat and point, so moisture and flavor travel together, like a well-planned road trip. If you spot large, hard fat deposits—those waxy clumps—you pass, I nod approvingly, and your brisket thanks you later.
Look for Fine Flecks
Flecks are your fortune-tellers. When you’re shopping to serve a crowd, do a calm, focused visual inspection. I’m talking fine flecks of fat, tiny white pin-dots scattered across the deep red meat, like stars on a clear night. Those little sparks melt slowly, baste the fibers, and keep slices juicy enough to make your guests fall silent, then ask for seconds.
Run a finger along the surface, feel the cool firmness, then tilt the brisket under the lights. See those specks shimmer? Good. If the flecks are coarse or chunky, flavor turns patchy, moisture runs hot-and-cold, and you’re suddenly carving apologies. You want delicate, even peppering, especially through the flat where tenderness can lag. Trust the speckles, not the label. Your table will thank you.
Even Fat Distribution
Stars spotted, now scan the sky. You’re looking for even fat, spread like soft clouds, not clumped like a storm. I want you to picture slices that stay juicy end to end, because you cared about balance, not luck. Check the flat and the point—consistent marbling means flavor everywhere. Think ideal coverage: a thin, uniform layer on top, fine threads inside. Trust your eyes, then your fingertips—smooth, supple, slightly cool.
| What to check | What you want |
|---|---|
| Surface fat | Thin, even blanket, no bald patches |
| Inner marbling | Fine lines across the whole muscle |
| Flex and feel | Bends gently, fat feels silky |
Glance at fat grading, but let your senses lead. You’re feeding people, not a spreadsheet, and even fat makes every plate sing.
Avoid Large Hard Deposits
While marbling should look like fine lace, big hard chunks of fat are party crashers—loud, stubborn, and slow to melt. You’re here to serve a tender slice, not wrestle a waxy bite. I’m with you. Let’s practice quality control right at the case: scan for smooth, creamy threads, not knobby, chalky blobs. Those hard deposits won’t render; they sit there, scoffing, while your guests wait.
1) Press test: tap the fat cap; you want slight give, not a rock. If it’s firm like cold soap, pass.
2) Visual scan: look for fine, even marbling, creamy white, no yellowish nodules or hard edges.
3) Trim logic: imagine slicing—will those knots survive the cook? If yes, keep walking. You’re choosing flavor, moisture, and kindness.
Evaluate the Fat Cap Thickness and Quality

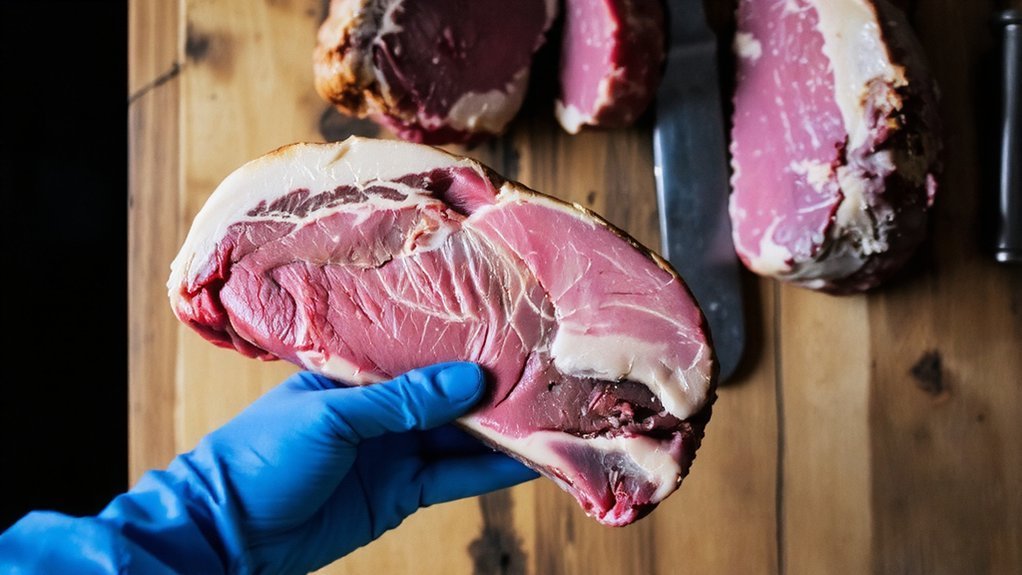
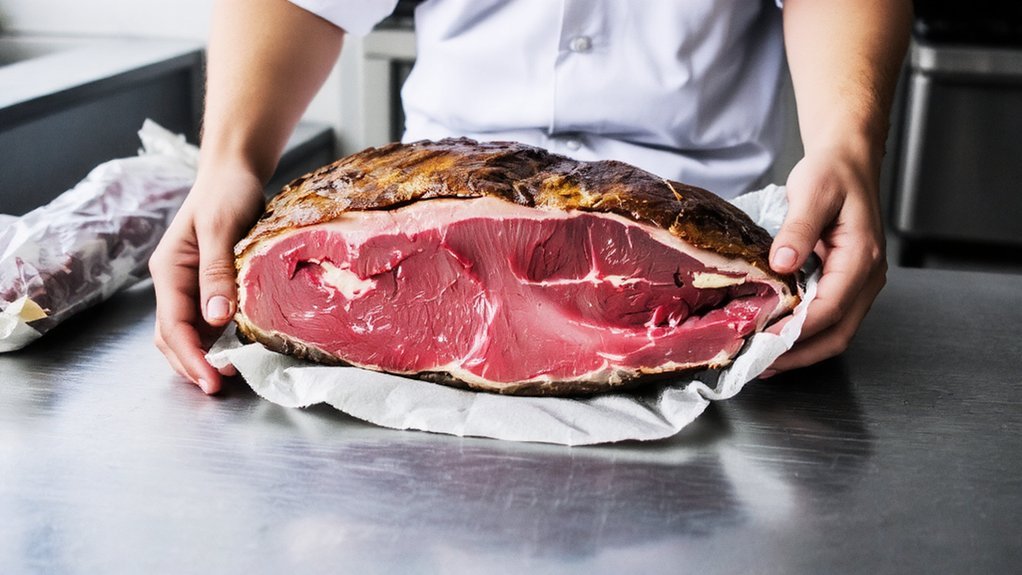
Because great brisket starts with smart trimming, let’s talk fat caps—the creamy white blanket on top that either protects your meat or smothers it. You’re cooking for people you care about, so choose wisely. I like a fat cap around 1/4 inch, firm yet pliable, like cold butter you can press with a thumb. That thickness renders, bastes, and shields without drowning the bark. That’s the fat cap importance in one bite.
Now, fat cap types matter. Look for clean, pearly white fat, not gray, waxy, or oily. Avoid spongy, puffy pockets; they melt weird and taste bland. Feather-like lines of fat, good. Hard, chalky slabs, bad. Run your fingers along the surface. Smooth glide, slight resistance, you’re golden. Hear me whisper? Trim later, not now.
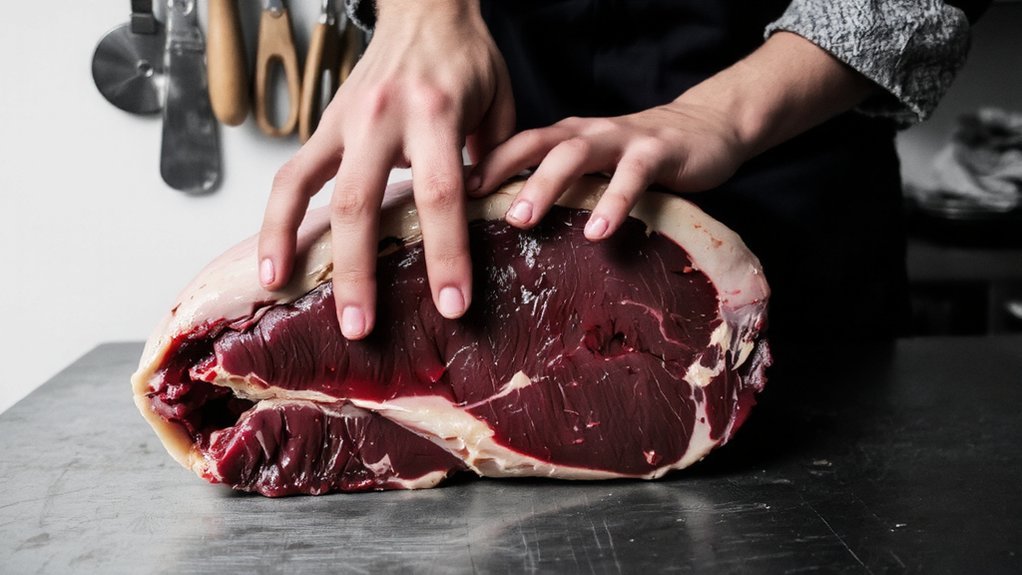
Look for Uniform Thickness and Taper
You want a brisket that’s mostly the same thickness across the slab, so it cooks evenly and doesn’t leave you with sad, dry corners—trust me, I’ve been that corner. Look for a gentle taper from flat to point, like a smooth hill, not a ski jump. If the edges are thin and ragged, put it back, because those wispy ends burn fast, taste bitter, and ruin your victory lap.
Even Thickness Matters
A good brisket tells you a secret the second you pick it up: even thickness means even cooking. You’re cooking for people you love, so don’t gamble. Slide your palm across the flat, check that it doesn’t swell in the middle or vanish at the edges. Balanced brisket cuts reward you with steady heat, gentle rendering, and slices that make guests go quiet, the good kind.
Here’s how I spot it, fast, friendly, no drama:
- Lay it on the cart, eye level. If the flat stays uniform from end to end, you’re golden.
- Pinch test. Grab two spots, two inches apart, front and back. Similar give? Buy it.
- Plan your cooking techniques. Even thickness means predictable bark, juicy center, easier timing, calmer hosting.
Gentle Taper Preferred
When the flat narrows, do it like a runway, not a cliff. You want a gentle taper from the thick point toward the flat, smooth and gradual, so heat moves like traffic on a good Sunday, steady and kind. In brisket selection, I’m scanning the edge profile first, then running a palm along the surface. No sudden drop-offs, no awkward humps. Just a graceful slope.
Why? Even slices, even cooking, even smiles at the table. A steady taper keeps moisture where it belongs, so your slices shine, not sulk. Tip the brisket up, sight down the plane like you’re lining a landing, then rotate, slow and picky. If the line stays smooth, you’ve found a winner. Serve that beauty, and take a bow.
Avoid Thin Edges
Thin edges spell trouble, like flip-flops on a hiking trail—sure, they’ll get you there, but not without regret. You’re cooking for people you love, so don’t gamble with thin edge risks. Those skinny margins dry out fast, scorch quicker than the thicker center, and turn a generous slice into a sad, brittle strip. I want you confident, not constantly spritzing and praying.
Here’s how you spot and dodge those cooking challenges:
- Run your hand along the flat, feel for smooth, even thickness, not a sharp drop-off.
- Eye the taper: gentle slope good, abrupt cliff bad. Uniform shape cooks kinder, slices cleaner.
- Check the point’s corners, avoid paper-thin ends, aim for meaty edges that hold moisture.
Trust your touch, serve joy.
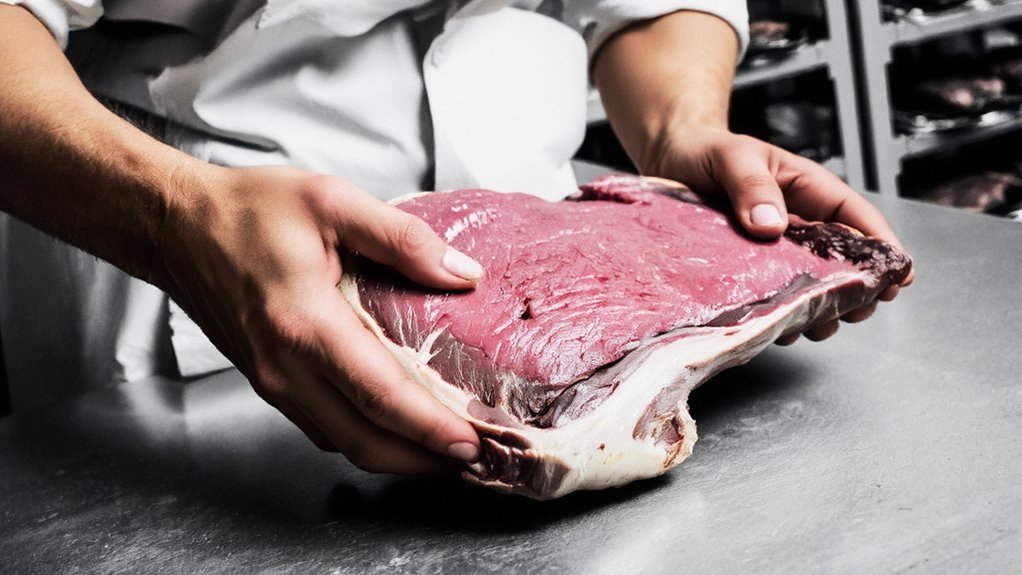
Perform the Flex Test for Tenderness Potential
| What you see/feel | What it means |
|---|---|
| Deep bend, easy droop | Tender potential, friendly collagen |
| Moderate arc, slight spring | Decent, workable with patience |
| Rigid board, minimal flex | Tough ride, skip it |
| Fat side yields, muscle follows | Balanced structure, even cooking |
Smile, nod, let the meat audition. You’re casting for comfort, not drama.
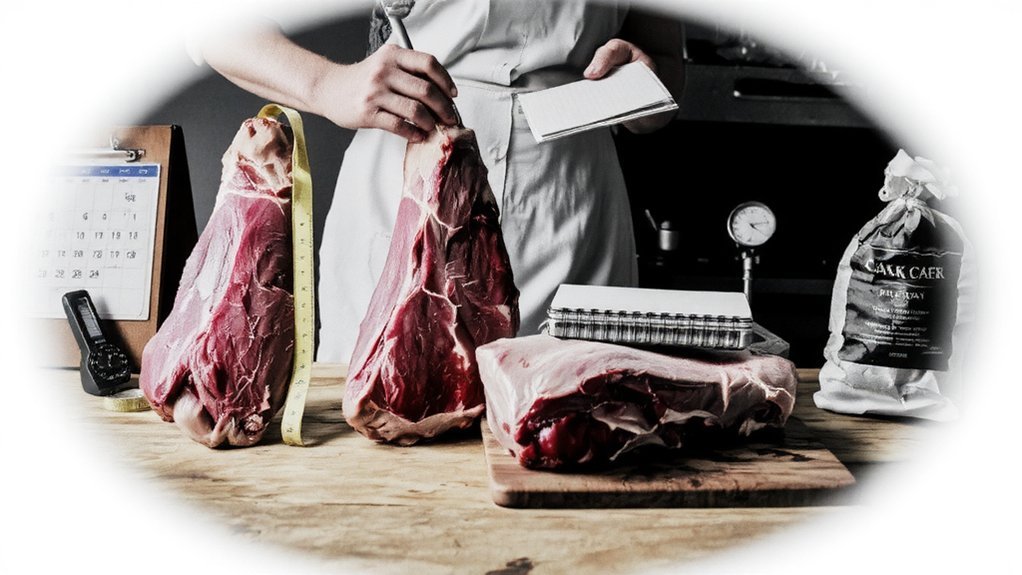
Check Weight and Size for Your Cooking Method
Before you grab the prettiest hunk in the case, match the brisket to your cooker, your clock, and your crew. I love big bark and long naps too, but your cooking method sets the rules. Weight considerations matter: a 14-pound packer won’t fit every smoker, and it sure won’t finish before Aunt May arrives with deviled eggs. Picture your grate, picture your guests, breathe, then choose.
1) Small grills or weeknight cooks: go 5–7 pounds, flat-only, slices for sandwiches, fast rest, happy neighbors.
2) Standard offset or pellet rig: 10–12 pounds, full packer, long cruise, balanced point and flat, juicy slices and burn ends.
3) Big pit, big crowd, big patience: 13–16 pounds, plan 1–1.5 hours per pound, generous rest, heroic platters.
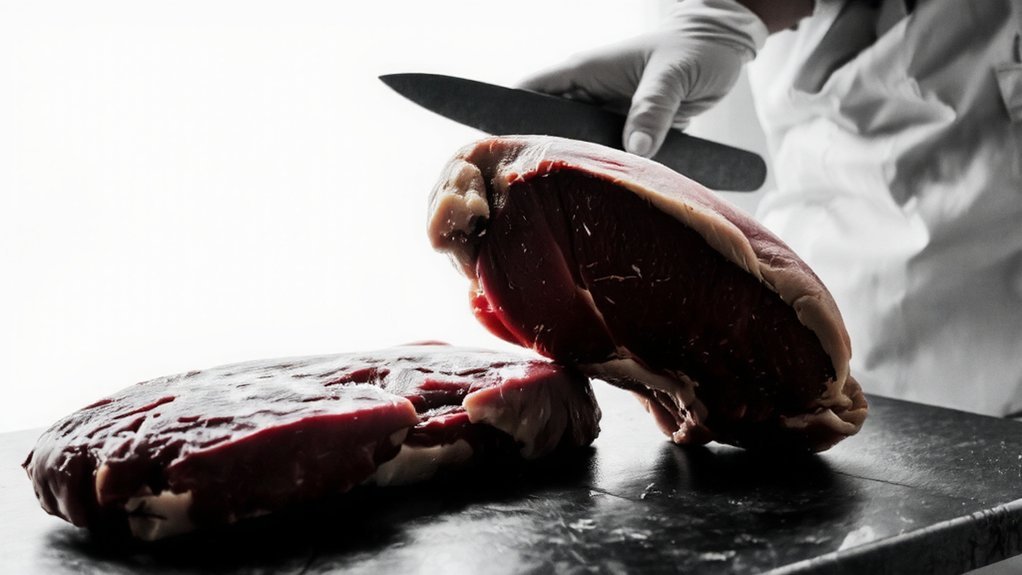
Inspect Color, Purge, and Packaging
Color tells the truth, so let’s read it like a gossip column. You want deep, cherry red, not gray, not brown. If it looks dull, it’s tired. If it glows, it’s ready to serve your crowd like a headliner. Flip the brisket, peek at the underside, and inspect freshness again—color should stay consistent, fat creamy and pale, never yellow and waxy.
Now the purge—the juice in the package. A little is normal, like stage sweat. A puddle with clots or funky haze? Hard pass. Smell test, quick and discreet: clean, meaty, neutral. Anything sour, metallic, or eggy, back it goes.
Finally, packaging integrity. No tears, no loose seals, no trapped air bubbles. Tight wrap, date stamped, cold as a handshake. You’re buying confidence, not drama.
Decide on Trim Level: Packer vs. Pre-Trimmed
You’ve checked the look, the smell, the wrap—now comes the big fork in the road: packer or pre-trimmed. Here’s where you choose how much control you want over fat, shape, and yield. I’ll shoot straight: packer selection gives you the whole brisket, deckle to flat, fat cap intact. More trimming, yes, but more flavor control, better bark, richer slices for your guests. Pre trimmed options save time and mess, and they’re tidy, but sometimes the knife got a little too enthusiastic.
1) Feel the fat cap: about 1/4–1/2 inch, not chalky, not greasy.
2) Flex the slab: a packer should bend like a friendly handshake, not a 2×4.
3) Check edges: clean, moist, no ragged shavings—your slicer later will thank you.
Match the Cut to Your Cooking Plan and Timeline
Even if your heart says “go big,” your clock might say “not today,” so let’s match the brisket to the plan. Hosting Saturday? Choose a packer for an overnight smoke; low-and-slow cooking methods reward patience, long naps, and righteous bark. Short on time? Grab a trimmed flat, roast or pressure-cook it, slice neat, serve fast. Feeding grazers? The point shines—juicy, marbled, perfect for burnt ends that disappear mid-sentence.
Now, preparation techniques matter. If you’ve got 18 hours, dry brine, simple rub, steady heat, done. Four hours? Braise with onions, garlic, broth, let the house smell like applause. Need weekday sanity? Sous vide, then sear for lightning bark. I’ll level with you—pick the cut your schedule can love, and your guests will taste your care.