Let’s not beat around the barn—your brisket can taste like it came off a legendary pit. You’ll pick the right hunk of beef, trim it smart, rain down a bold rub, then ride a clean oak-hickory smoke at steady heat. We’ll tame the stall, wrap like a pro, and rest it till it sighs. Slice against the grain, whisper “butter,” and try not to brag. Sound good? Grab your board—clock’s ticking.
Choose the Right Brisket: Grade, Size, and Marbling
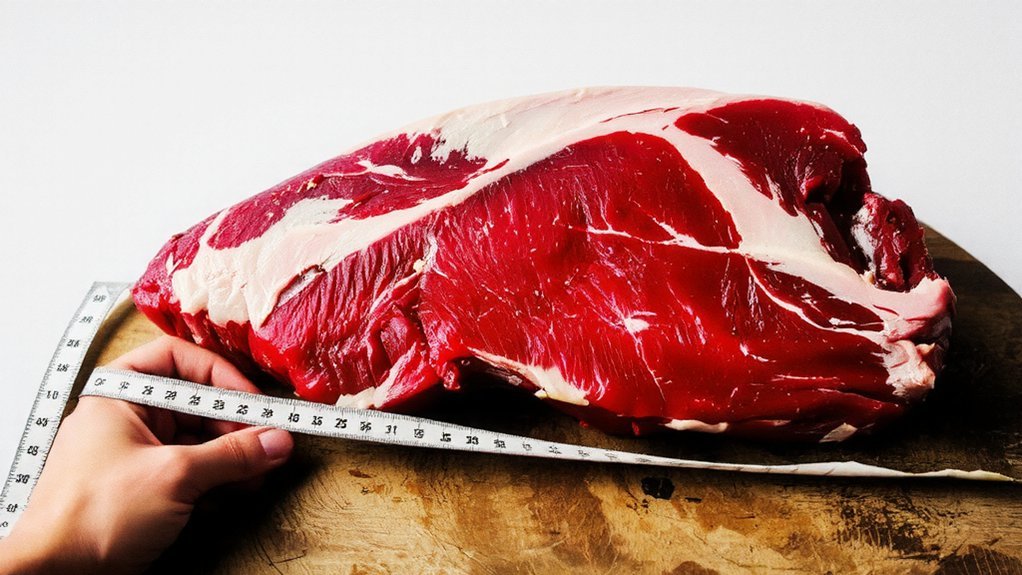
Here’s the deal: great BBQ starts at the butcher counter, not the smoker. You’re feeding people, not just fire, so let’s nail brisket selection. First, grade importance matters. USDA Prime gives lush marbling, juicy bites, and that “wow, who catered this?” vibe. Choice works too, budget-friendly, still tender with care. Skip Select unless you like dry apologies.
Grab a full packer, 12–16 pounds, point and flat attached. Heft it. If it bends like a hammock, you’ve got promise. Scan the fat seams—thin white threads weaving through deep red meat. That marbling melts, kisses each slice, and makes plates come back empty. Ask your butcher for a thick, even flat, minimal gouges, firm but pliable feel. Smile, thank them, then claim hero status later.
Trim Like a Pitmaster: Fat Caps and Aerodynamics
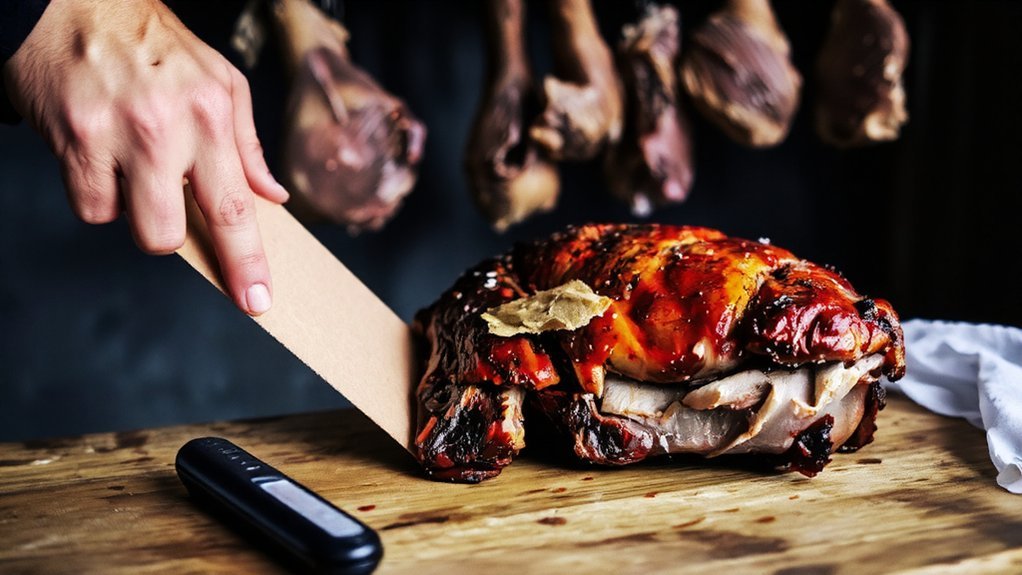
Although the knife feels like a lightsaber in your hand, you’re not carving the Death Star—you’re shaping airflow. You’re guiding heat so your brisket cooks evenly, renders cleanly, and serves like a gift. Start with smart trimming techniques: square the edges, round sharp corners, and smooth snaggy bits that catch smoke like Velcro. Leave a tidy fat cap, about a quarter inch, for insulation and flavor. That’s fat management, not wishful thinking.
I’ll talk, you carve: glide shallow, follow the grain, and keep the point aerodynamic so bark forms evenly. When in doubt, trim for flow, not show—your guests taste the difference.
| Area | Action | Why it serves |
|---|---|---|
| Flat edge | Square lightly | Even slices |
| Corners | Round off | Smooth airflow |
| Fat cap | 1/4 inch | Steady render |
| Hard knots | Remove | Cleaner bites |
| Point hump | Taper | Balanced bark |
Build a Classic Rub: Salt, Pepper, and Subtle Boosters

Start with the backbone: a clean salt-to-pepper ratio, usually 1:1 by volume, so you taste beef first, swagger second. Then, nudge the edges—pinches of garlic powder, a shy whisper of onion, maybe paprika for color and a warm nose—nothing loud, just background singers. Rub it on with purpose, feel the grains, and yes, I’m judging if you cake it like frosting.
Salt-To-Pepper Ratio
Because brisket lives or dies by its crust, we’ve gotta talk salt-to-pepper, the backbone of a classic Texas rub. You’re cooking for people you care about, so aim for balance: start 1:1 by volume, adjust to 60/40 salt-forward if your crowd loves a savory pop. I like coarse kosher salt with 16-mesh black pepper; big grains cling, bark sings. Try salt varieties wisely—kosher for control, flake for gentle hits, fine only for tiny touch-ups.
Here’s the move: pat the meat dry, trim, then rain from 12 inches up for even coverage. That’s one of those simple seasoning techniques that looks fancy and works. Coat until it’s speckled, not buried. Rest 20 minutes; the surface sweats, crystals melt, pepper wakes up. Smell that? You’re ready.
Subtle Flavor Enhancers
Whisper, don’t shout—that’s the rule for boosters that ride shotgun with salt and pepper. You’re serving guests, not wrestling their taste buds, so we’ll build quiet power with smart flavor layering and gentle umami boosters. Think “nudge,” not “megaphone.” I want your brisket to smell like a hug, taste like a handshake, and finish like a standing ovation.
- A pinch of garlic powder, for warm, savory bass notes.
- Onion powder, just enough to bloom sweetness when the bark sets.
- Smoked paprika, a soft echo of smoke that flatters, not competes.
- Ground coffee, ultra-fine, for roasted depth and a bittersweet wink.
- A dust of mushroom powder, clean umami that melts into beefy richness.
Mix lightly, coat evenly, wait patiently. Serve joy, slice proudly.
Wood and Smoke: Selecting Species and Managing Clean Burn

If the fire is your orchestra, the wood is first chair, so let’s pick players that can actually carry a tune. Choose bold wood species like oak for backbone, hickory for punch, mesquite for a short solo, then sweeten with cherry or apple. You’re cooking for people you care about, so aim for balanced smoke flavor, not campfire cosplay.
Start with seasoned splits, bark mostly off. Feed small pieces often, let them ignite fast, and watch the exhaust. Thin, blue smoke? That’s a clean burn. White, billowy clouds? Bitter city, turn back. Crack the firebox, give it air, and keep the flames lively. Heat management begins with your wood: uniform size, dry as honesty, steady as kindness. Do that, and your brisket sings.
Fire Control: Stable Temps and the Stall Strategy
Soon as that brisket hits the pit, the real game starts: you’re not cooking meat, you’re steering weather. I’m with you at the firebox, sleeves up, eyes on the flames. Fire management isn’t flashy, but it’s ministry with oak and iron. Aim for steady 250–275°F; that’s your kind, patient voice in temperature regulation. Small splits, clean burn, thin blue smoke, calm heart.
- Preheat the pit fully, let metal and grates sink heat deep.
- Feed small wood splits on a schedule, don’t panic-chunk logs.
- Set vents once, nudge gently; wide swings scare bark and neighbors.
- Place a water pan; it smooths temps, softens edges, serves the meat.
- Trust two thermometers, grate and brisket, not feelings.
Then, the stall. Stay steady, let evaporation work, keep faith, keep tending.
Wrapping Methods: Butcher Paper vs. Foil vs. Naked
You’re about to pick your brisket’s wardrobe, and it changes everything: foil traps heat like a sauna, butcher paper breathes a bit, and going naked, well, that’s brisket streaking in a breeze. I’m telling you straight—more heat retention means faster cook times but softer bark, while less wrap equals slower cook, deeper smoke, and a crust that snaps like a good punchline. Choose your wrap for the finish you want: glossy and juicy, rugged and smoky, or bold and bare.
Heat Retention Differences
Because brisket is basically a sleepy dinosaur roast, how you wrap it decides how warm it stays—and how fast it cooks. You’re coaching a giant slab with serious thermal mass, so manage heat insulation like you mean it. Foil traps warmth and steam, butcher paper breathes a bit, and going naked lets the pit do the heavy lifting. I’m chasing predictable temps so you can serve juicy slices right on time.
- Foil: fastest cook, strongest heat hold, great when guests are early.
- Butcher paper: moderate insulation, steady pace, flavors stay lively.
- Naked: slowest, needs tight fire control, rewards patience.
- Windy day? Wrap sooner; you’ll conserve precious pit energy.
- Resting strategy: keep wrapped, cooler-tucked, to bank heat for service.
Choose your wrap to match your schedule, crowd, and pit.
Bark Texture Impact
Even if tenderness steals the headlines, bark is the crowd-pleaser that makes plates go quiet. You’re cooking for smiles, not stats, so manage bark formation like it’s your mission. Foil? It’s a sauna—fast, juicy, but it softens bark, giving you a glossy, bite-through crust with minimal crunch. Butcher paper is the sweet spot; it breathes, holds moisture, and protects color, so you get craggy edges, pepper pop, and steady texture variations. Naked is for the bold—no wrap, full smoke, deeper mahogany, loud crunch, but slower cook and higher drying risk. I’ll say it: choose based on the crowd. Want shreds for sandwiches? Foil. Balanced slices for platters? Paper. Show-stopping bark for the pit-nerds? Go naked, watch eyebrows lift.
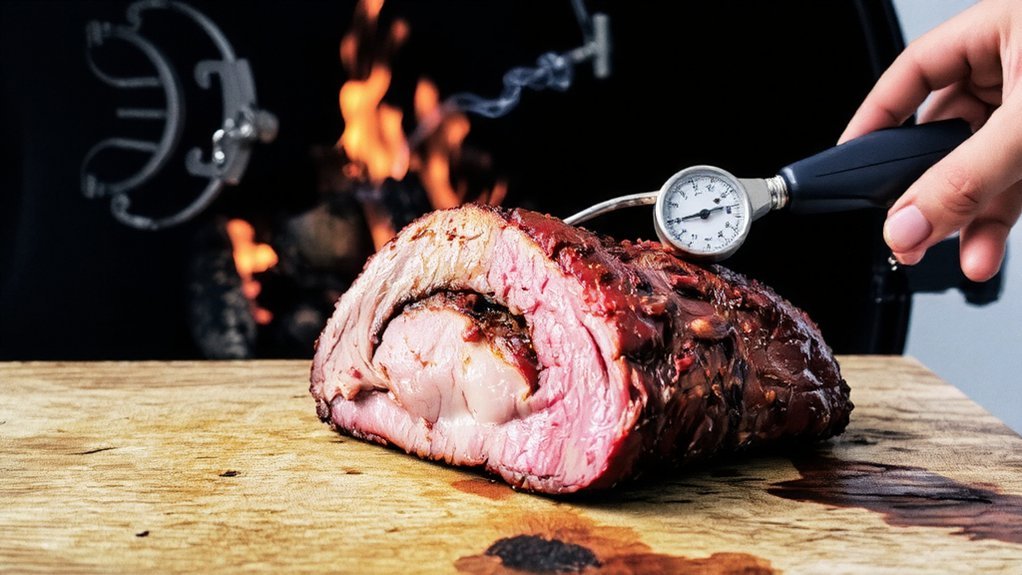
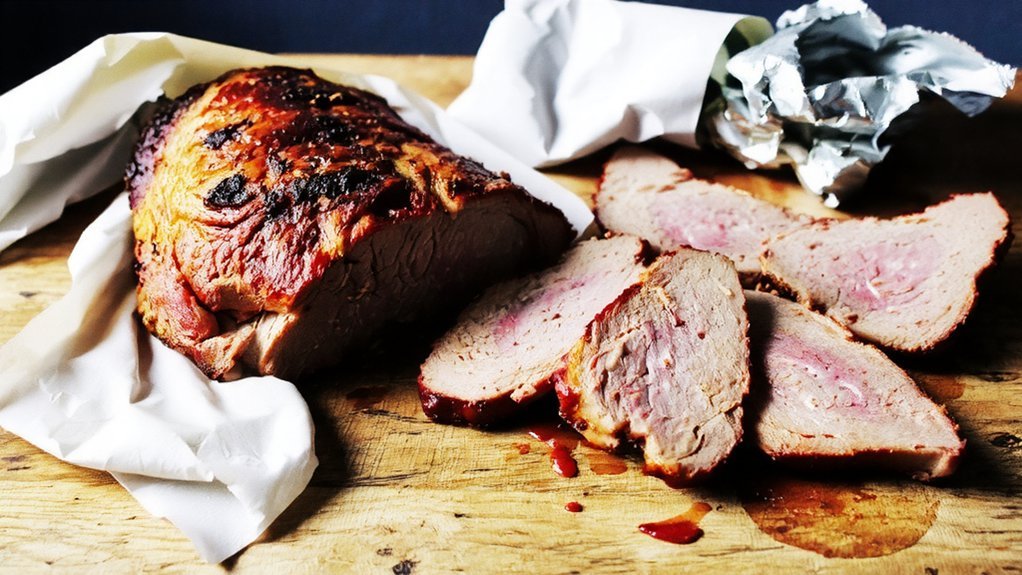
Doneness and Resting: Probe Tender, Hold, and Slice
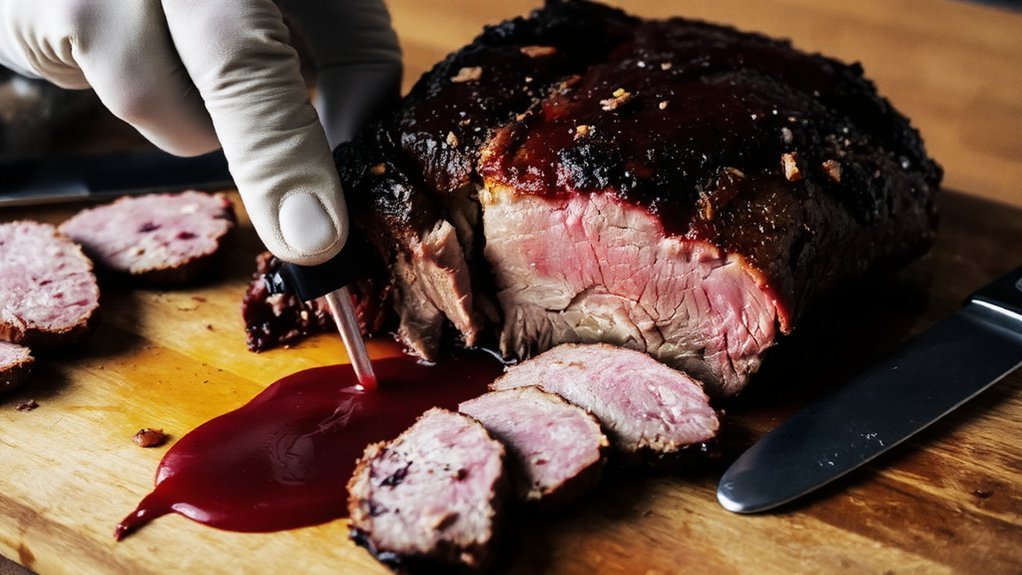
When the bark is bronzed and the fat’s whispering, it’s time to stop guessing and start poking. Slide a thermometer or skewer into the flat and point. You’re hunting doneness indicators: it should glide like warm butter, no grit, no squeak. If it fights back, keep cooking. If it sighs, you’ve won. Now, be a hero—protect that juice. Use smart resting techniques, then slice like you mean it.
Probe for butter glide, not grit. Vent, wrap, hold warm. Slice bold, serve proud.
- Probe multiple spots, especially the thickest part of the flat.
- Aim for buttery resistance, not mush, not rubber.
- Vent steam 5 minutes, then wrap tight for the hold.
- Hold 1–4 hours in a warm cooler, towels tucked, tenderness rising.
- Slice across the grain, pencil-thick, point richer, flat leaner. Serve with pride.
Options for Any Setup: Smoker, Kettle Grill, or Oven
However you fire it up, I’ve got a game plan that fits your gear and your patience. Running a smoker? Set 250°F, clean smoke rolling, post oak or hickory. Simple salt-and-pepper leads most brisket styles, but you can add garlic, a whisper of chili. Hold steady heat, spritz when bark looks dull, let the meat sing.
Kettle grill? Two-zone setup, charcoal banked, a wood chunk for soul. Vent half-open, 250–275°F. Keep the lid shut, you’re the steward, not the star. Same seasoning techniques, same probe test later.
Oven night? No shame, just precision. Sheet pan rack, 250°F, light rub, foil only when bark sets. Toss in a spoon of beef tallow, because hospitality tastes like richness. Serve slices warm, juices saved, smiles loaded.