Like coaxing a shy cat from under the couch, brisket just needs time, warmth, and a little patience—no smoker required. You’ll grab a heavy pot, sear until the kitchen smells like a steakhouse, splash in stock and onions, then let it murmur on low heat, lid snug, for hours. I’ll show you how to hit that magic 195–205°F, slice like a pro, and fix common mistakes. Ready to make stovetop brisket blush?
Why Brisket Works on the Stovetop
Because low and slow is your superpower on a stovetop, brisket absolutely shines there. You control heat like a maestro, coaxing collagen into velvet while your kitchen smells like a deli on a holiday. I’m not mad about it. With patient stovetop methods, you stir, baste, and listen—little bubbles whispering, “Almost.” That’s how brisket tenderness happens: steady simmer, gentle steam, zero panic.
You sear for deep crust, deglaze with something bold, scrape up the good bits, then tuck the meat into a cozy bath. Lid on. Heat low. Time does the rest, while you prep sides and set the table for people you love. Check, turn, taste, adjust. Small acts, big payoff. When it slices like butter, you’ll grin, serve generously, and take a bow.
Choosing the Right Cut and Size
Though every brisket promises greatness, not every brisket fits your pot—or your plans. You’re cooking to bless a table, so let’s nail cut selection, because size matters when you’re serving hungry people. I’m talking tender bites, glossy juices, and that sigh-around-the-room moment.
Not every brisket fits your pot—or your plans. Choose wisely, serve joy, earn that room-wide sigh.
1) Choose point for richer fat, saucy shredding; pick flat for neater slices that fan across a platter.
2) Match length to your pot; if it bows like a seesaw, trim ends, don’t cram—steam ruins bark, and morale.
3) Estimate portions: plan 1/2 pound raw per guest; double for hearty eaters, or that uncle who “samples.”
4) Look for even thickness, creamy fat cap, tight grain; press it—supple, not floppy. You’ll taste that care later.
Essential Equipment and Ingredients
First, set yourself up with a heavy, wide pot and a steady burner—no wobbly flames, no cramped quarters, just a calm, even simmer that smells like patience. Then grab the essentials: brisket, salt and pepper, onions and garlic, tomato paste, beef stock, a splash of vinegar or Worcestershire, and a bay leaf or two—simple stuff, big payoff. I’ll nudge you through timing and heat, you’ll bring the sizzle, and together we’ll make the kitchen smell like victory.
Pot and Burner Setup
One solid pot, one steady flame, and we’re in brisket business. You’re cooking for folks you care about, so let’s set you up right. I like heavy pots—cast iron or enameled Dutch ovens—because they hold steady burner heat, hug flavor, and don’t scorch. Stainless works too, if it’s thick-bottomed. Thin pans? Hard pass. They cook hot, then ghost you.
Here’s the quick setup, crisp and kind:
1) Choose smart from pot types: 6–8 quarts, wide base, tight lid.
2) Center the pot over the burner, level and stable, no wobbles.
3) Set burner heat to medium-low; you want gentle bubbles, not angry lava.
4) Keep a diffuser handy; it evens heat, saves dinner, and your reputation.
Alright, apron on, let’s make magic.
Key Brisket Ingredients
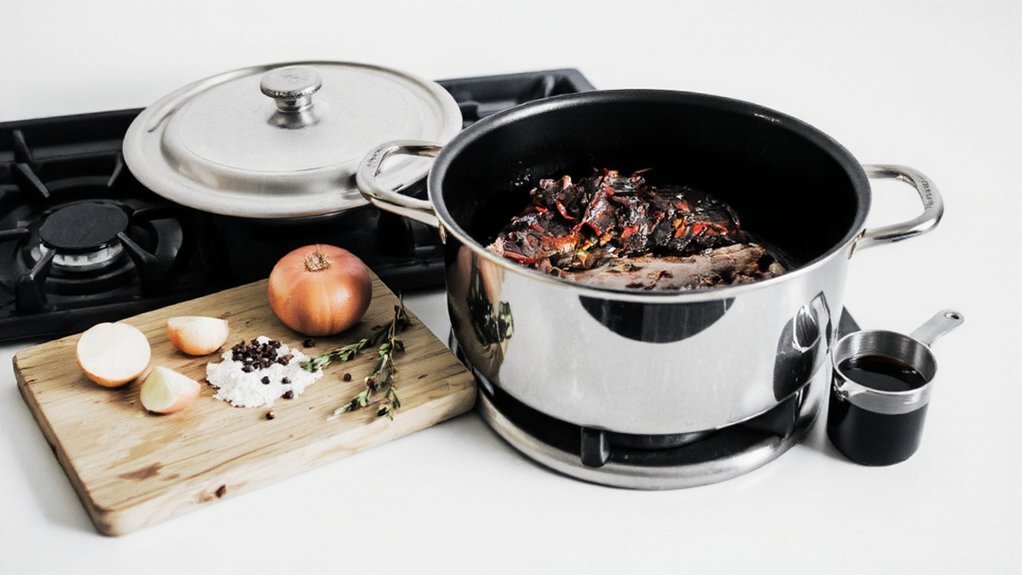
Ingredients first, glory later. You’re serving people you care about, so let’s stock the right stuff. Grab a well-marbled brisket, 3–5 pounds, trimmed but not shy on fat. You’ll need kosher salt, fresh black pepper, smoked paprika, garlic and onion powder—clean, dependable seasoning options. Brown sugar? Optional, but it kisses the bark. For a brisket marinade, whisk beef stock, soy sauce, Worcestershire, apple cider vinegar, and a spoon of Dijon. Toss in smashed garlic, bay leaves, a sprig of thyme.
You’ll also want neutral oil for searing, tomato paste for depth, and a splash of coffee or stout if you like drama. Aromatics—onion, celery, carrot—build the base. Finish with low-sodium stock. Simple, sturdy, service-minded. You bring the heart, these ingredients bring the applause.
Step-by-Step: Sear, Deglaze, and Braise

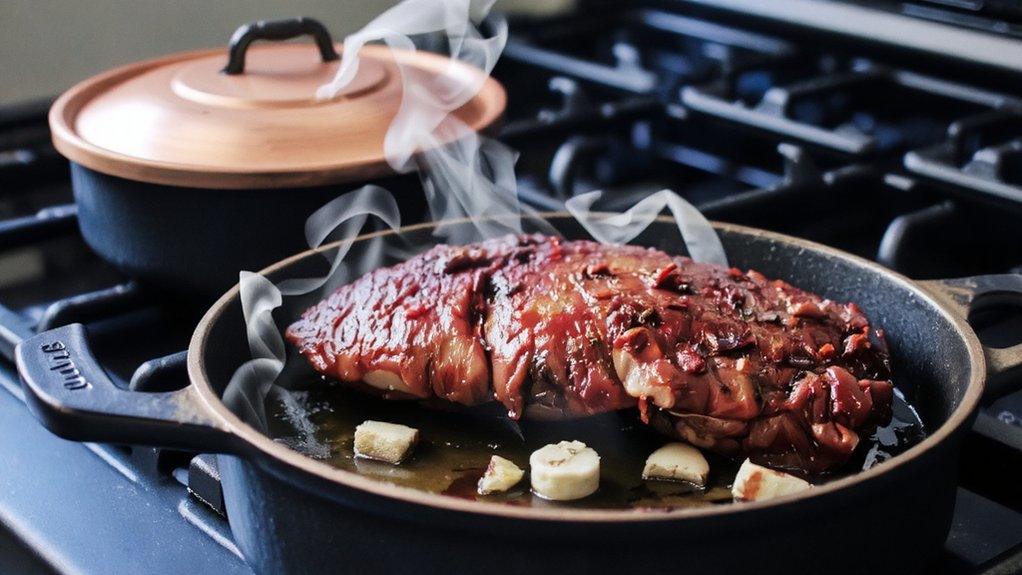
You’ll start with a perfect stovetop sear: pat the brisket dry, salt it boldly, then press it into a ripping-hot, lightly oiled pan until the crust smells nutty and looks mahogany, not tan. Hear that sizzle, don’t fidget, I’ll tap the brakes on my impulse to poke it—let the fond build like brown confetti stuck to the pan. Now we deglaze: splash in stock or wine, scrape with a wooden spoon to free every tasty bit, and you’ve just revealed deep, smoky flavor that sets up a gorgeous braise.
Perfect Stovetop Sear
Before we drown that brisket in cozy braising liquid, we’re going to give it a swaggering sear—the kind that smells like a steakhouse and sounds like applause. You’re cooking to bless people, so let’s use perfect searing techniques that put smiles on plates. Pan blazing hot, patience on high, ego on low. We’re achieving crust, not steaming sadness.
1) Pat dry, generously salt and pepper. Damp brisket sputters, dry brisket browns—little acts of care matter when you’re feeding others.
2) Heat a heavy pot until it whispers smoke, add a thin film of high-heat oil, no more.
3) Lay the brisket in, fat-side down, press lightly, then don’t touch it. Let it earn color.
4) Sear all sides, including edges, until mahogany, 3–5 minutes per side.
Deglazing for Deep Flavor
Once that brisket wears a mahogany tux, we raid the fond—the dark, crusty flavor confetti glued to the pot. Kill the heat for a beat, then splash in a cup of liquid: dry red wine, beef stock, or a mix. Hear the hiss? That’s flavor begging for rescue.
Use deglazing techniques like this: wooden spoon, flat edge, steady scrape. Work every corner, lift those caramelized bits, let them melt into the liquid. Add onions, a garlic smash, maybe tomato paste, sizzle them until glossy. Reduce to syrupy, a lazy bubble, deep and shiny. Taste, season, breathe. That’s flavor enhancement, right there.
Now you’ve got a bold base, ready for the braise. Brisket returns, liquid barely kissing, lid on, kindness revealed.
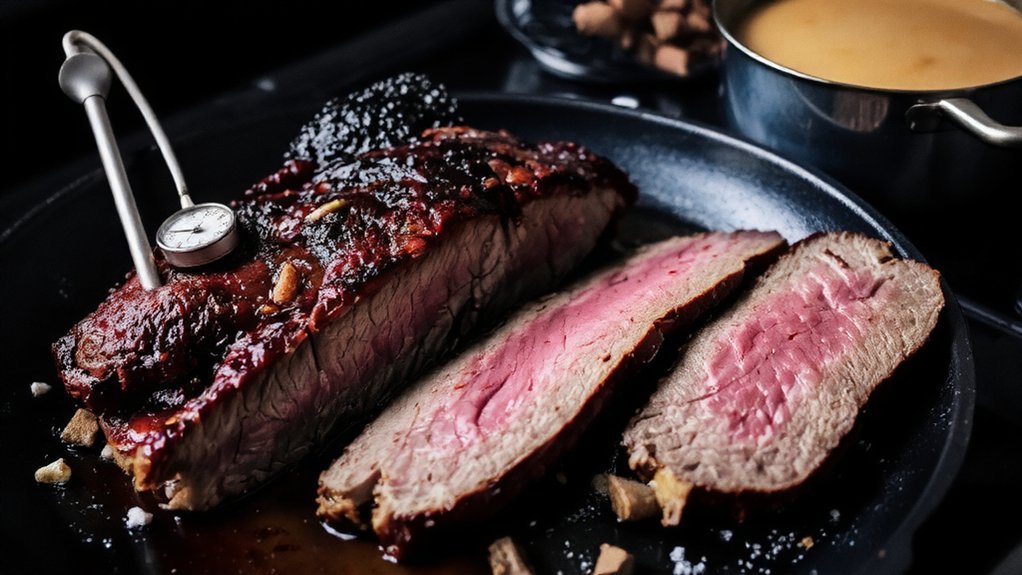
Timing, Temperatures, and Doneness Cues
Although brisket loves to take its sweet time, the clock and the thermometer still call the shots—and I’m watching both like a hawk with trust issues. On the stovetop, low and gentle wins. I use timing techniques as a guide, not a leash: plan 3–4 hours for a 3–4 pound flat, longer if it’s thicker, always simmering, never boiling.
Low and gentle wins: simmer, don’t boil. Trust the clock, worship the thermometer.
Here’s how I keep you on course, so your guests feel cared for:
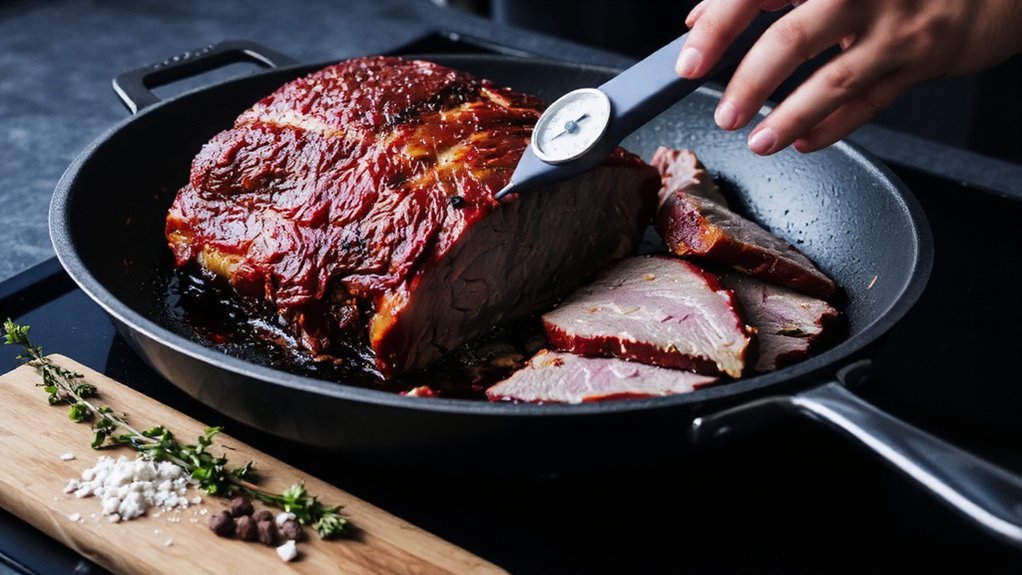
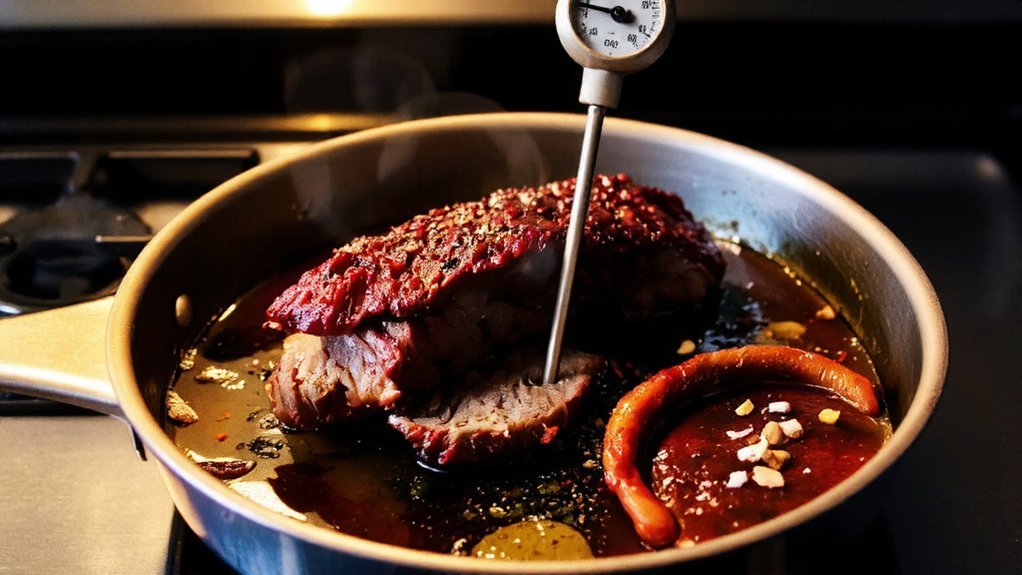
1) Hold 195–205°F internal, steady as a Sunday school teacher.
2) Track pot temp: gentle burble, not a rolling storm.
3) Test doneness indicators: probe slides in like warm butter, meat bends, juices run glossy.
4) If it fights back, keep cooking; collagen’s stubborn.
Listen, patience serves flavor, and you’re hosting greatness.
Resting, Slicing, and Serving
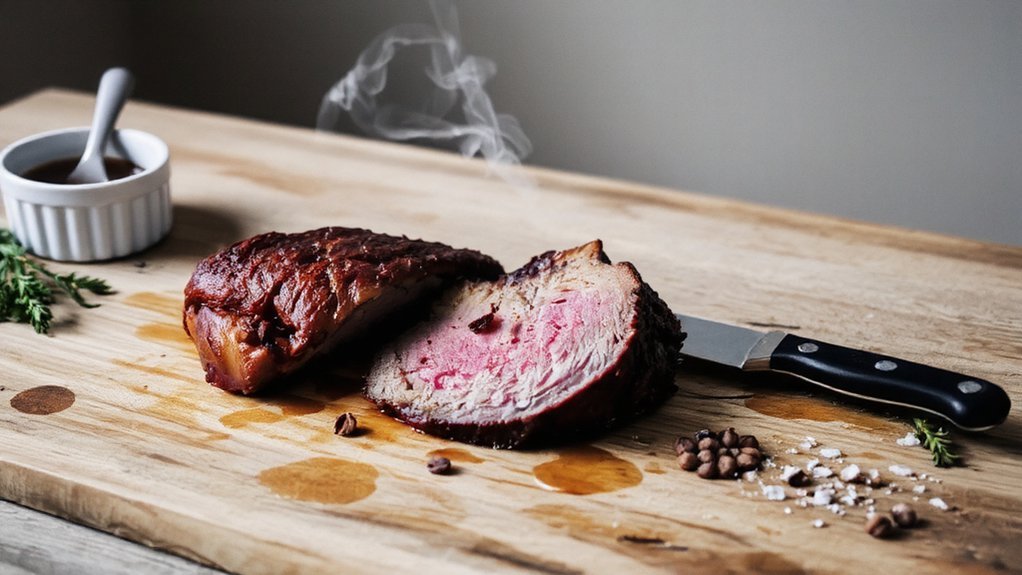
If patience made you a saint at the stove, the payoff starts now—kill the heat, lift that brisket like a crown jewel, and let it rest. Slide it to a board, tent loosely with foil, and give it 20 to 30 minutes. That’s one of the simplest resting techniques, and it keeps juices where they belong.
Ready to carve? I’ve got you. For clean slices, separate point from flat, rotate to spot the grain, then use long, gentle strokes. Those are reliable slicing methods, not samurai moves.
Now, serve with intention. Offer thin slices for sandwiches, thicker for plates. Spoon warm jus, pass pickles, coleslaw, and soft rolls. For flavor pairings, reach for mustard, chimichurri, roasted carrots, buttery potatoes, and a bright, lemony salad.
Troubleshooting Dryness, Toughness, and Blandness
Even saints scorch a brisket now and then, so let’s fix dryness, toughness, and blah flavor before your dinner turns into chew-toy cosplay. I’ve been there, apron stained, pride dented. Here’s how you rescue it and still serve with heart.
1) Identify dryness causes: heat too high, lid off, not enough liquid. Add warm stock, a splash of fat, cover tight, simmer low. Moisture retention loves gentle steam.
2) Toughness solutions: collagen needs time. Slice a bite—if springy, keep simmering until a fork sighs. Cut against the grain, thin as postcard edges.
3) Blandness remedies: bloom spices in butter, whisk in Worcestershire, acidity, and salt. Glaze the slices.
4) Final kindness: hold in sauce, covered. Serve hot, with extra jus for dipping.