You want brisket that melts, not fights back, right? I’ve got you—from picking the right cut and grade, to trimming fat, rubbing it down, and building bark that crackles like campfire candy. We’ll manage temps, outsmart the stall, and cook low and slow—smoker, grill, oven, or even a slow cooker if your landlord hates smoke. Then we’ll test for tender, rest it right, and slice like a pro. Ready to make your kitchen smell dangerous?
Choosing the Right Brisket: Flat vs. Point and Grade
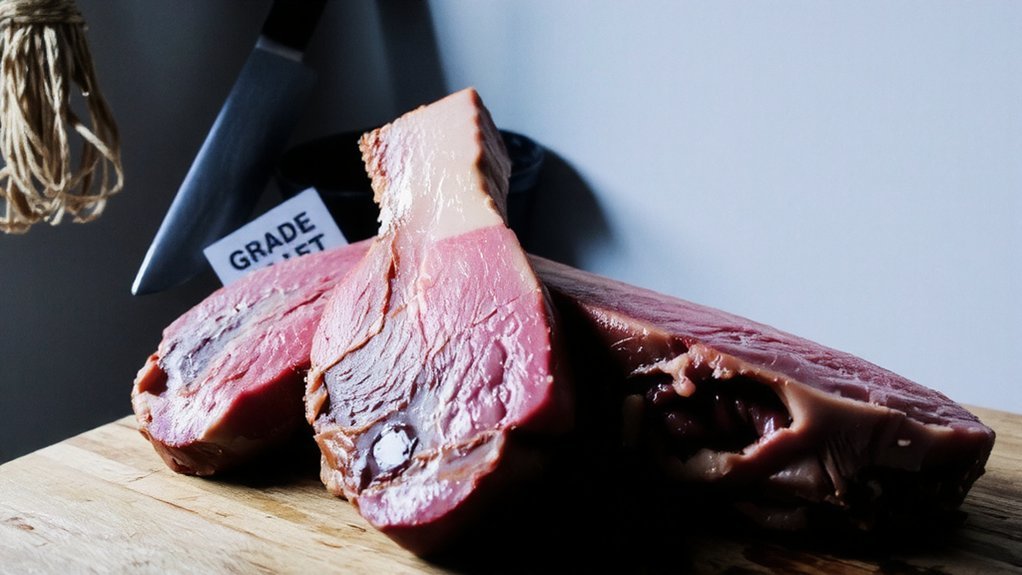
Maps matter. When you’re cooking for others, you need a plan, and brisket cuts are your map. Start with the two main regions: the flat and the point. The flat’s lean, long, and tidy, slices clean for platters at church socials. The point’s thicker, marbled, and gloriously juicy, perfect for guests who ask for seconds before firsts. Different flavor profiles follow the fat: lean flat tastes beef-forward, subtle; the point delivers rich, buttery decadence.
Now grades. Choice brings solid marbling at a friendly price. Prime packs more intramuscular fat, translating to tenderness and forgiveness. Select? Only if your budget insists, and you’ve got patience. Aim for flexible slabs, creamy white fat, a uniform shape, and a weight you can manage without wrestling gear.
Trimming, Seasoning, and Building a Flavorful Bark

You’re about to make big choices with small consequences, starting with the fat: keep a thin, even cap—about a quarter inch—then trim hard, clean edges, no ragged scraps. Now we talk rubs—salt and pepper as your base, 1:1 by volume, then layer in garlic, paprika, maybe a whisper of chile, building flavor like bricks, not a sandstorm. Pat it on, don’t rub it off, and let the meat sweat a bit—sticky surface, happy bark, your smoke’s new best friend.
Selecting the Right Fat
Although the meat’s the headline, the fat is the plot twist that makes your brisket unforgettable. You’re cooking to bless a crowd, so choose wisely. Start with fat types: look for a brisket with a thick, even cap, creamy white to pale butter in color, firm but not rock hard. Yellow, waxy fat? Pass. That cap, about a quarter inch after trimming, bastes as it renders, keeping slices juicy, tender, generous.
Now, flavor profiles. Clean beef tallow reads buttery and rich, while softer, crumbly fat melts faster, nudging sweetness and a nutty whisper. Give the point a little more fat love; it carries bold, beefy depth. Sniff, press, decide. If it smells neutral and feels silky, you’re golden. Your guests will taste the care.
Rub Ratios and Layers
Before the rub ever hits the meat, the real magic starts with a smart trim, a clean surface, and a plan for layers that build bark like brickwork. You’re serving people you care about, so tidy the fat cap to a quarter inch, square ragged edges, pat it dry. Now, rub types and ratios. I go two parts kosher salt, two parts coarse black pepper, one part paprika. That’s your base, your honest handshake.
Next, choose flavor profiles to match your crowd: a whisper of garlic and onion for comfort, chipotle for warmth, espresso or cocoa for depth, sugar only if your pit runs gentle. Sprinkle, don’t spackle. Press, don’t rub off. Rest 20 minutes, let it sweat. Finish with a light topcoat, like seasoning a cast-iron pan. Then smoke. Let the bark earn applause.
Temperature Control and Understanding the Stall
You’ll lock in a sweet spot between 225° and 250°F, steady smoke rolling, fat whispering as it renders; I’ll nag you to babysit the pit like it’s your teenager with the car keys. Then comes the stall, that maddening plateau around 150°–170°F where the bark looks perfect, the temp refuses to budge, and your patience gets crispy. You’ll ride it out or wrap in butcher paper for a gentle push, and yes, I’ll clap when the probe slides in like warm butter.
Ideal Smoking Ranges
Once the fire settles into a steady glow, we start playing the only game that matters: temperature control. You’re aiming for 225–250°F, the sweet, generous lane where fat renders slowly and smoke kisses the bark, not body-slams it. I ride that range like a friendly bus driver—steady, patient, never late. Use clean-burning splits, choose steady wood choices like oak or post oak, then layer character with cherry or pecan. Lean into simple smoking techniques: small vents, small corrections, big results. Keep the pit calm, and the meat will serve your guests like a quiet hero.
- Check grate-level temps with a reliable probe, not the lid dial.
- Add thin blue smoke, never billowing white.
- Feed small splits, often.
- Adjust vents in tiny moves, then wait.
Navigating the Stall
Even as the bark darkens and the yard smells like a campfire you actually want to wear, the brisket hits that infamous wall—the stall—and your thermometer stops moving like it’s on strike. Breathe. The meat’s sweating; evaporation cools it, like tiny fans stealing heat. That’s normal.
Here’s how you serve your people well. First, hold steady heat, 225–250°F, clean smoke, thin and blue. Don’t chase the needle. Patience required. Drink water, check vents, calm the fire. Next, choose your stall strategies: ride it out for deeper bark, or Texas crutch—wrap in butcher paper or foil at 160–170°F, add a splash of broth, back on the grate. Probe tenderness, not numbers. When it jiggles like warm Jell-O, you’ve won. Rest, slice, share. Repeat the glory.
Cooking Methods: Smoker, Grill, Oven, and Slow Cooker
Although the path to tender brisket looks like a choose-your-own-adventure, each route—smoker, grill, oven, or slow cooker—lands you in juicy territory if you play it right. I’ll steer, you’ll serve, and your crew will ask for seconds. On a smoker, lean into patient smoking techniques: clean fire, thin blue smoke, steady airflow. The bark blooms, the fat sighs, neighbors hover. On a grill, use two zones; my favorite grilling tips? Lid down, vents dialed, wood chunks for kisses of smoke. Oven roasting is calm, consistent, perfect for overnight hospitality. The slow cooker, low and loyal, yields sliceable comfort for church potlucks.
- Pick your fuel: charcoal, hardwood, or convenience
- Set up two zones, always
- Wrap strategically, or don’t, on purpose
- Rest generously before carving
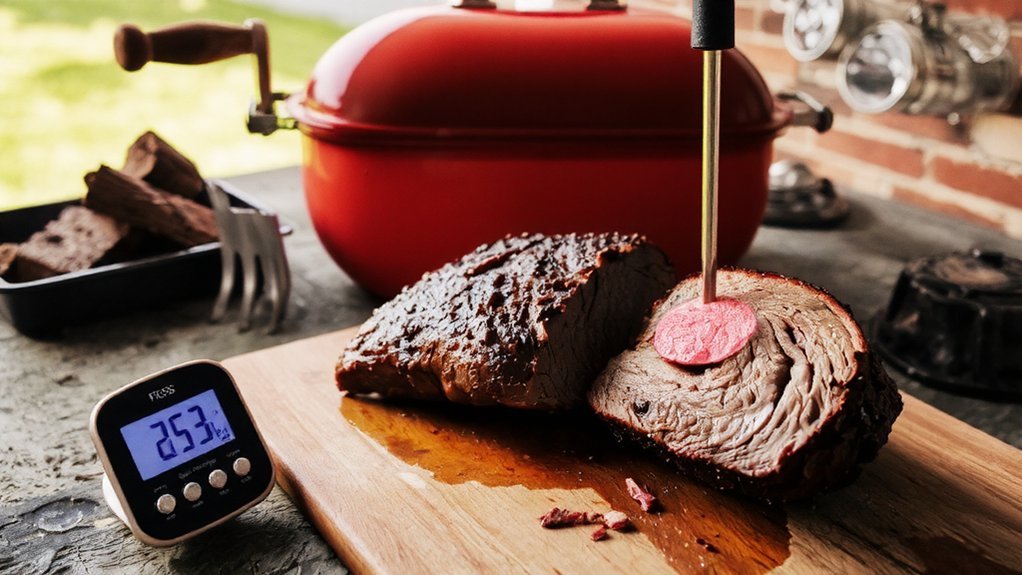
Testing for Doneness: Probe Tenderness and Internal Temps
You picked your heat path—smoker, grill, oven, or slow cooker—now we answer the only question that matters: is it done-done? Grab a thin probe or skewer, and let’s talk probe techniques. Slide it into the flat and the point, aiming with care like you’re checking a cake, but meatier, juicier, nobler. You’re chasing tenderness indicators: butter-like glide, no snag, no grudging chew. Then confirm with temps; numbers serve people well.
| What you feel | What you read |
|---|---|
| Firm, springy resistance | 170–185°F, keep cooking |
| Gentle push, slight grab | 190–198°F, close |
| Smooth, like warm butter | 199–205°F, likely done |
| Poke in multiple spots | Consistency matters |
| Bones? Nope, brisket’s boneless | Trust feel, temps verify |
If it’s not there yet, breathe, cook on.
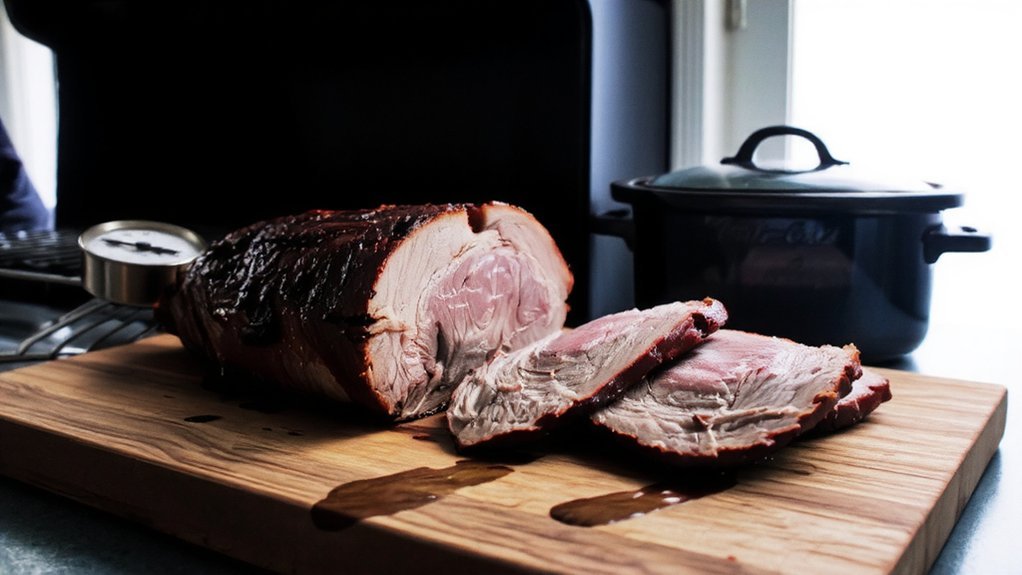
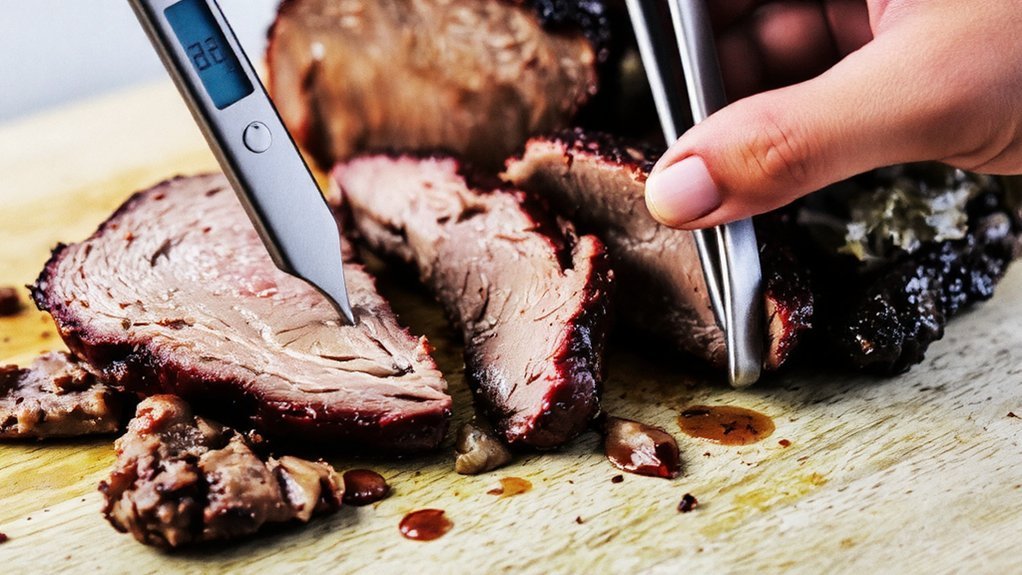
Resting, Slicing, and Serving for Best Texture and Taste
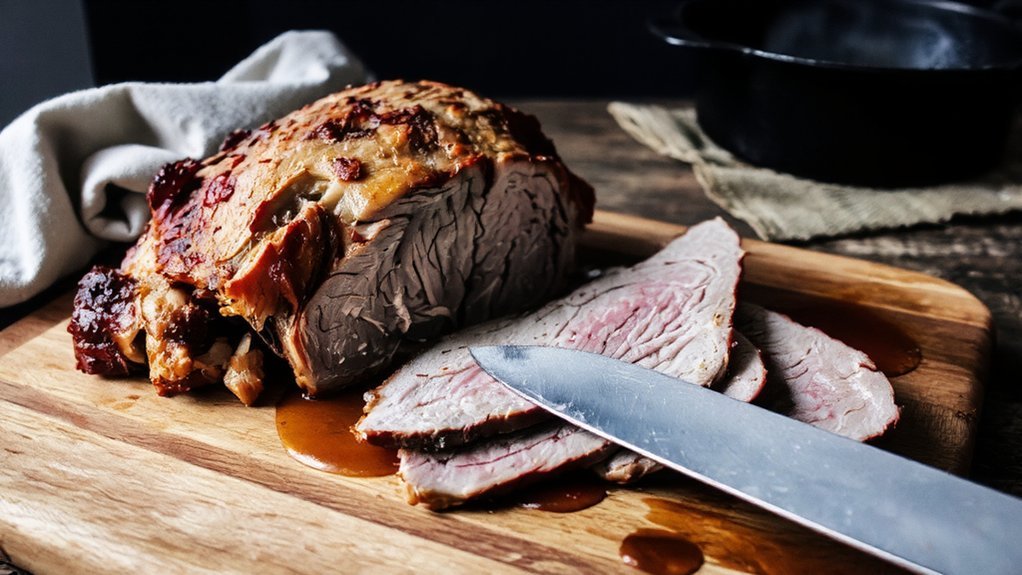
Once that brisket hits probe-tender, resist the hero move and step back—I promise the victory lap comes after the nap. Use calm, steady resting techniques: vent the wrap five minutes, then hold in a towelled cooler 1–3 hours. Juices settle, bark softens just right, and you, generous host that you are, get breathing room. Now, slicing methods: separate point from flat, turn the flat so the grain runs left-to-right, and slice pencil-thick with a long, sharp knife. Point gets thicker, juicy slices—save the crumbs for snacks. Plate with simple serving suggestions and smart flavor pairings—tangy pickles, soft rolls, sharp slaw, a peppery jus.
- Hold time hacks: cooler, towels, patience
- Knife setup and angle check
- Grain-finding trick: corner test
- Build-your-own platter plan