Envision this: Saturday, 6 a.m., you, a stubborn brisket, and a coffee that tastes like courage. You’ll pick the right cut, trim it neat, dust on a bold rub, then let slow smoke kiss it until the bark crackles and the center jiggles like a shy Jell-O. I’ll show you temps, tools, and tricks pros swear by, plus fixes when things go sideways. Ready to make brisket that shuts up your uncle?
Choosing the Right Brisket Cut
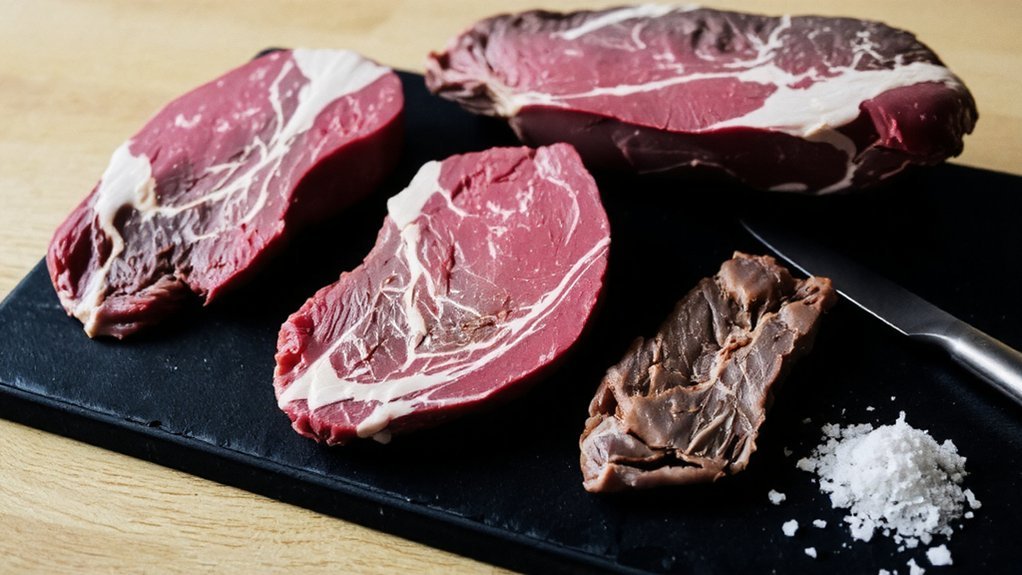
First things first, you need the right brisket, because no rub or smoke can save a bad cut. You’re cooking to bless people, so pick a slab that’ll melt hearts, not jaws. Start with brisket grades: Prime brings rich marbling, juicy slices, applause. Choice works great too, more budget-friendly, still tender if you mind the temps. Select? I’d pass, unless you love dry sermons.
Now, cut differences. The packer cut includes point and flat, big, wobbly, generous fat—perfect for slicing and burnt ends. The flat is lean, even, great for neat slices at church socials. Look for creamy white fat, not waxy yellow, and bend the brisket—good ones flex like a lazy cat. Thick flat, uniform shape, no thin tail. You’ll serve smiles, not excuses.
Essential Tools and Equipment
Alright, you’ve got the right brisket—now let’s talk gear, because a great cut still needs the right toys to sing. You’re cooking for people you care about, so pick brisket tools that serve them well.
First, a reliable smoker or oven that holds steady temps; consistency saves dinners and egos. Add a digital probe thermometer, preferably dual-probe, so you watch pit and meat, no guesswork. Grab a sturdy sheet pan and wire rack, for transport and resting. You’ll want heatproof gloves—grease pops, pride shouldn’t. Long tongs and a wide spatula, for gentle flips. A spray bottle for moisture, apple juice or water works. Butcher paper and heavy foil, for wrapping options. Finally, a good carving knife and board with grooves—clean slices, happy plates. That’s your essential equipment.
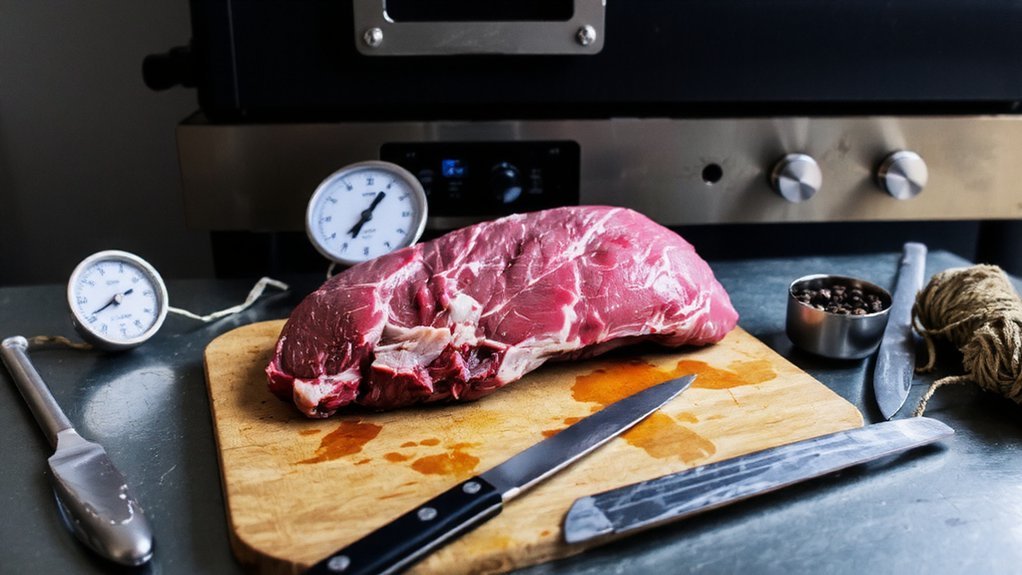
Trimming and Prepping the Brisket
Start by spotting the fat cap, that thick, waxy blanket on top—keep about a quarter inch for protection, trim the rest so it’s smooth and aerodynamic. Flip it, and with a sharp knife scrape off the silver skin, that shiny, stubborn layer that blocks flavor like a bouncer on payday. Now pat it dry, swipe on a light binder—mustard or oil works—then shower it with your rub, edge to edge, like you mean it.
Identifying Fat Cap
Two things matter before you even plug in the smoker: knowing where the fat cap is, and how much of it to keep. Flip the brisket so the smooth, creamy-white layer faces up—that’s the cap. Run your fingers over it; you’ll feel firm fat on top, looser meat underneath. That contrast tells you where you are.
Now, fat cap importance? It’s your built-in basting system. As it renders, it protects the meat, kisses it with flavor, and keeps guests smiling. But fat cap management matters too. Aim for a tidy quarter-inch across the top, thicker on the flat’s lean end, slightly thinner where the point is rich. Find hard, waxy edges—those won’t melt kindly. Mark them, plan your trims, and set up for juicy, generous slices later.
Trimming Silver Skin
While the fat cap gets all the glory, the silver skin is the sneaky villain that won’t melt, won’t season, and definitely won’t chew nicely. You’re cooking to care for people, so let’s fix it. Set the brisket cold-side up on a board, towel under it for grip. I slide a boning knife under a corner, blade almost flat, then lift gently, like opening a stubborn envelope.
Here’s the move: pinch the flap, pull forward, and glide the knife back, shallow strokes, tiny shavings, not chunks. That’s silver skin removal done right. Switch angles as needed, chase the shiny sheets, leave the good fat. Trim sinew seams too. Clean edges, no ragged spots. These trimming techniques keep bites tender, slices beautiful, smiles guaranteed.
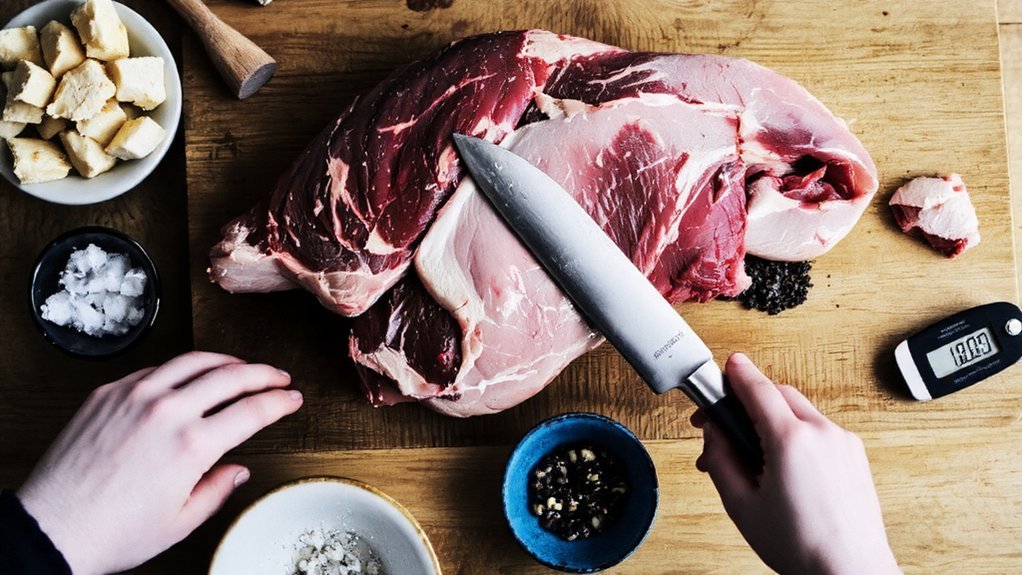
Applying Binder and Rub
Next comes the fun paint job—binder first, rub second, flavor all over. You’re serving people you care about, so let’s make this brisket sing. I like simple binder options: yellow mustard, hot sauce, or a light drizzle of beef tallow. Go thin, whisper-thin, just enough tacky shine so seasoning sticks, not slides.
Now, rub techniques. Hold your hand high, snowflake the salt and pepper mix, then add paprika, garlic, a kiss of sugar. Don’t massage, you’re not a spa; press it in, firm and even. Coat edges, hit the sides, lift the flat, catch the hidden spots. It should smell peppery, a little sweet, with that mustard twang. Flip, repeat, breathe. Looks speckled, feels gritty, no bald patches. Rest ten minutes. You’re ready to smoke.
Dry Rubs, Marinades, and Seasoning Tips
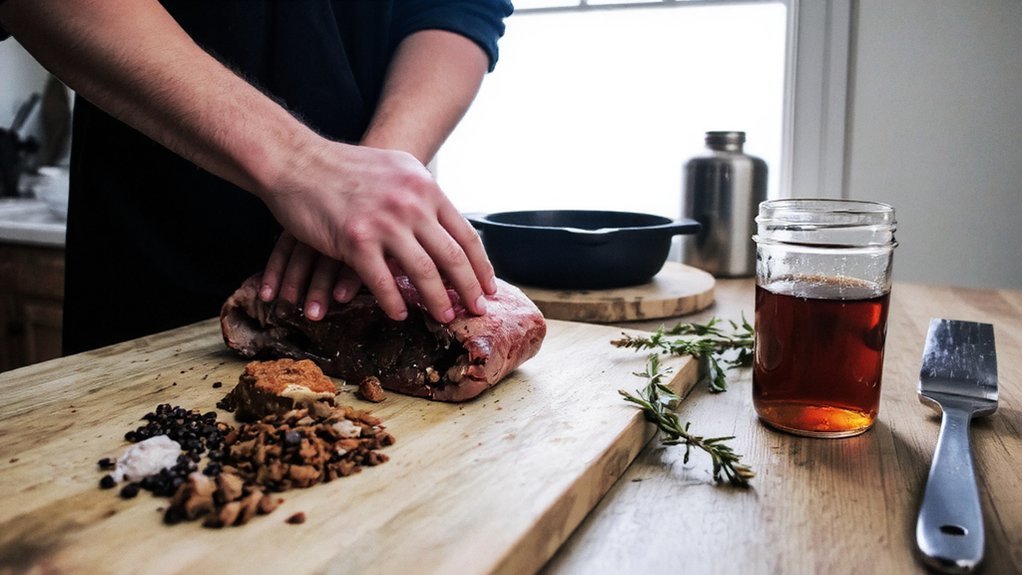
You’re about to pick a spice profile, so choose your vibe: earthy black pepper and paprika for classic bark, smoky chipotle for heat, or a sweet garlic-onion blend if you’re feeling crowd-pleaser. Salt early, generously, and evenly—coarse kosher, please—and let the brisket rest in the fridge so the grains pull that seasoning deep, like rain sinking into dry soil. Then relax; I’ll nag you about marinades next, but for now, you’ve set the stage for big flavor and a crust that snaps.
Choosing Spice Profiles
Two roads, same brisket: dry rub or marinade, and I’ll help you pick your lane without veering into bland-town. Start by imagining who you’re feeding. Big crowd, bold tastes? Go with a dry rub, layered spice combinations that cling, bark up, and deliver swagger. Think pepper, garlic, smoked paprika, cumin, a whisper of cocoa, maybe chipotle for smolder. Prefer juicy, fragrant slices? Use a marinade, balancing acid, fat, and aromatics—soy, Worcestershire, orange zest, thyme, cracked pepper, a little honey for glaze.
Match flavor profiles to the vibe: Texas-leaning heat, coffee-and-chile rugged, or herb-and-citrus elegance. Toast whole spices, grind fresh, breathe in the steam—yep, that’s the moment. Keep your hand steady, your intent generous. You’re not seasoning meat, you’re seasoning memories.
Salt and Resting Time
Before heat ever kisses that brisket, salt has to do its quiet magic, and time is the amplifier. You’re cooking to serve people well, so start simple: pick salt types that melt cleanly into the meat. I like kosher for grip, fine sea salt for even coverage, and flaky for a showy finish. Salt 1/2–3/4 teaspoon per pound, front and back, edges too. Then wait. Fifteen minutes blooms surface moisture, four hours starts seasoning deeper, overnight builds savory thunder.
| Salt Type | When to Use | Flavor/Texture |
|---|---|---|
| Kosher | Primary seasoning | Clean, steady, easy pinch |
| Fine Sea | Even coat | Quick dissolve, balanced |
| Flaky Sea | Finish | Crunch, sparkle |
| Smoked | Accent rub | Campfire whisper |
| Garlic Salt | Light dust | Savory boost |
Now, resting techniques: after cooking, tent loosely, 30–60 minutes, juices relax, slices stay silky. Serve proud.
Smoking Method: Low and Slow
While the pit warms up and the neighborhood starts sniffing around, we’re going low and slow—classic smoke therapy for brisket. You’ve salted and rested, now you shepherd the cook. Steady fire, tender heart. Aim for 225–250°F, calm as Sunday service. Let the meat warm a bit, pat it dry, then set it fat-cap up, point to the heat.
Now the fun part: wood selection. Choose post oak for classic Texas, hickory for bold, fruit woods for gentle sweetness. Mix if you like, but keep the smoke flavor clean, thin, blue. If it looks like chimney soot, you’re overdoing it.
Spritz lightly every hour, apple cider and water works. Don’t rush. Trust the bark, listen for sizzle-whispers, and keep feeding your crowd patience.
Oven Method: Set-It-and-Forget-It

Even if the smoker’s sleeping, your oven’s got range, and we’re cashing in. You’re cooking for people you love, so let’s make this brisket melt and shine. Set your oven temperature to 300°F. Pat the brisket dry, season like you mean it, then sear both sides in a hot pan till mahogany and proud. Slide it into a roasting pan, fat cap up, add onions, garlic, a splash of broth. Foil tight. No drafts.
Now the calm part. The cooking time runs about 3 to 4 hours for a small flat, 5 to 6 for a full packer, until a probe slides in like butter at 200–205°F. Rest, still wrapped, 30 minutes. Slice against the grain. Plate generously, smile bigger. You just served comfort.
Slow Cooker Method: Hands-Off Comfort
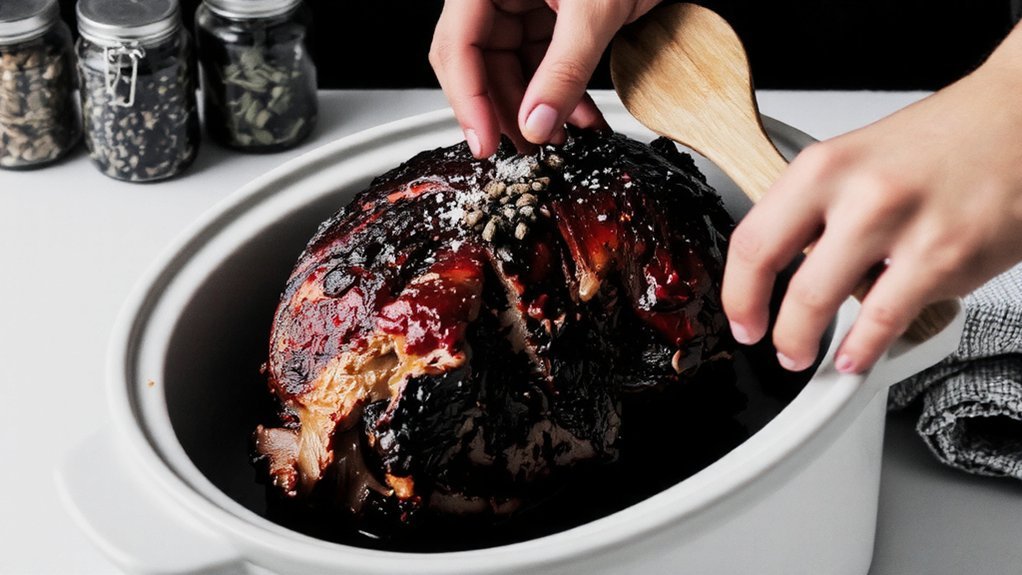
Because some days call for zero heroics, the slow cooker steps in like your chill best friend with a warm hug. You season the brisket generously, salt, pepper, paprika, maybe garlic and onion powder. I sear mine first for caramelized edges—ten hot minutes, worth it. Into the crock it goes with sliced onions, a splash of beef stock, a nudge of tomato paste, maybe a whisper of Worcestershire.
Here’s the beauty: slow cooker benefits shine when you’re serving others. You set low, walk away, return to melt-in-your-fork tenderness, juices rich and glossy. While it hums, you tackle sides, tidy the table, finish meal prep, even write place cards if you’re fancy. Shred or slice, ladle the onions over, share generously, accept applause gracefully.
Monitoring Temps: Probes, Targets, and Timing
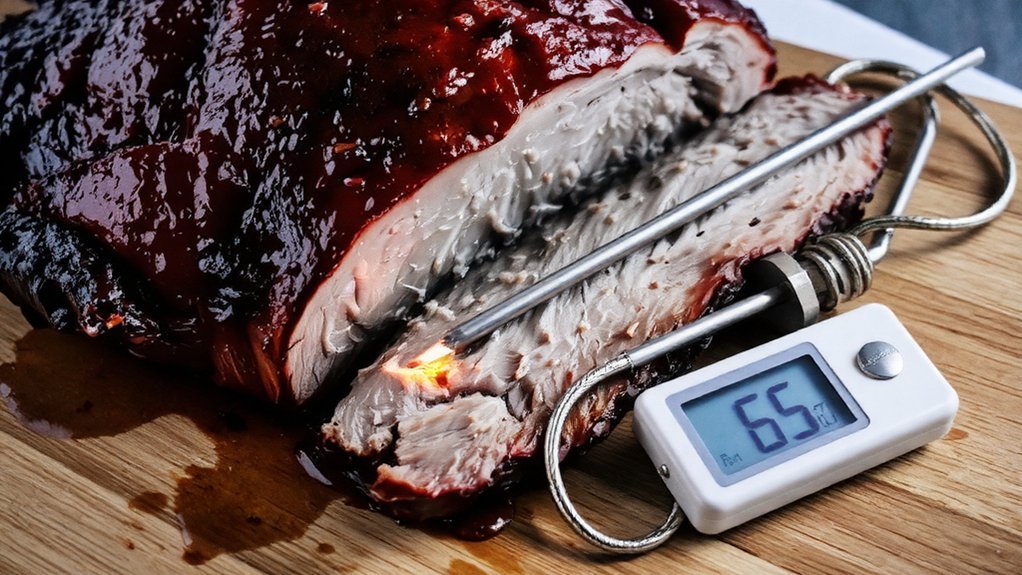
You’re about to play surgeon with a probe, so slide that tip into the thickest part of the flat, not the fat cap or a seam, and keep it clear of bone and the hot pan edge. You’re chasing numbers: 165°F for the stall, then ride it to 200–205°F for slicing like butter, with a 30–60 minute rest that feels eternal but pays off in juicy glory. I’ll keep time, you watch the readout, and together we’ll call the moment—clean probe, slow drip, happy brisket.
Probe Placement Tips
Two rules keep your brisket honest: put the probe in the right spot, and stop chasing air-temp drama. You’re cooking for people you care about, so let’s place that probe like it matters—because it does.
Slide the tip into the thickest part of the flat, halfway up, parallel to the grain. Avoid fat pockets and the point’s marbled chaos; they lie. Aim for the meat’s center mass, not the edge, not the bark. If you feel a sudden soft give, you hit fat—back out a touch. With different probe types, test temperature accuracy in ice water and boiling water before the cook. Use a small-diameter probe for cleaner holes, less juice loss. Keep the cable away from hot metal, anchor it neatly, and don’t poke twice—commit once.
Target Temps and Timing
Clocks lie, but brisket tells the truth if you listen. You’ll guide the cook with target temperatures, not wishful thinking. I’m watching numbers so your guests get slices that sigh with juice, not apologies. Probe set? Good. Now let’s ride.
- Smoke phase: hold the pit at 225–250°F, steady and calm. Expect long cooking times, 60–90 minutes per pound.
- Stall zone: around 150–170°F internal, moisture evaporates, temps plateau. Wrap when the bark looks dark, smells nutty, feels tacky.
- Push to tender: aim for 200–205°F internal, but judge doneness by feel—probe slides in like warm butter.
- Rest well: vent 5 minutes, then hold wrapped at 150–170°F for 1–3 hours. Juices settle, fibers relax, smiles appear.
Serve proud, serve generous.
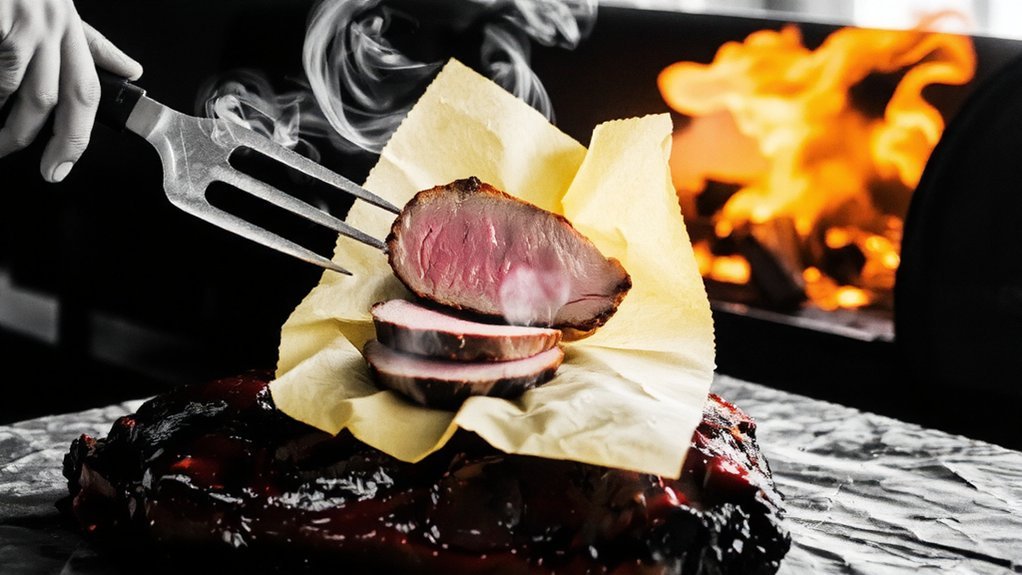
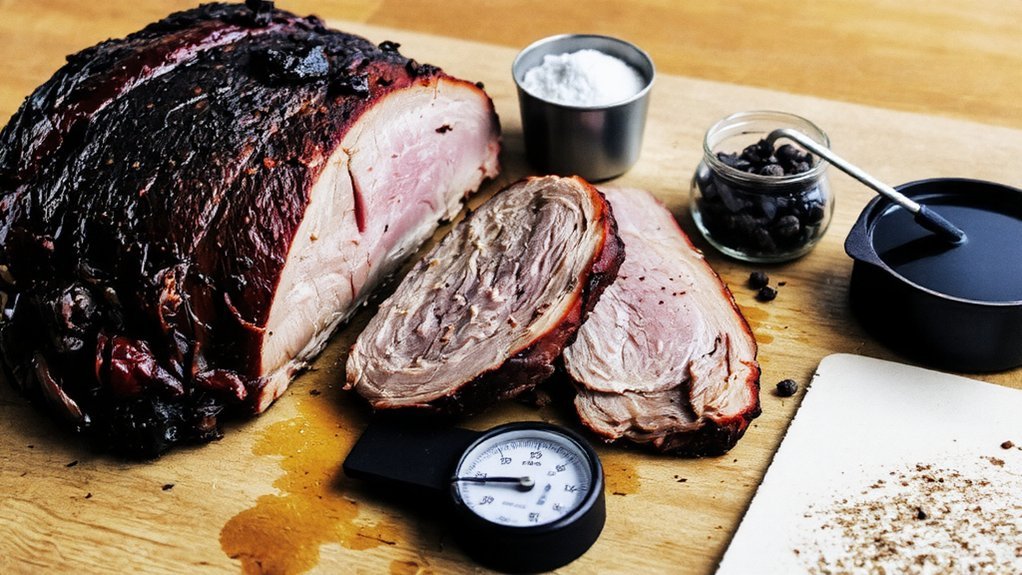
Resting, Slicing, and Serving
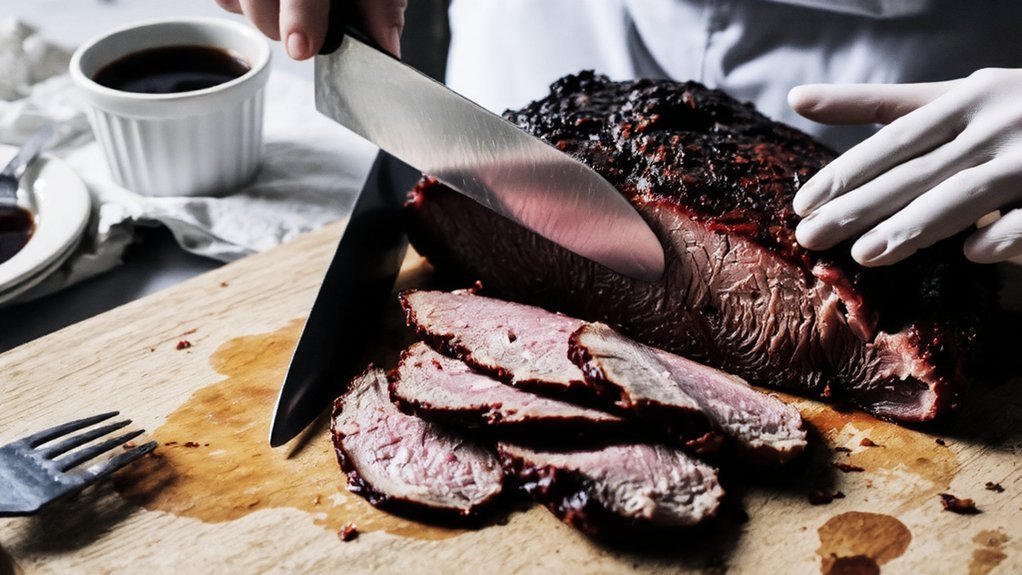
Once that bark turns mahogany and the fat’s whispering like it knows secrets, we hit the brakes: rest time. Pull the brisket, vent the wrap for a minute, then park it in a dry cooler or warm oven, loosely tented, 45 minutes to 2 hours. Patience serves your guests better than bravado.
Now, slicing technique. Separate point from flat. Turn the flat so you’re cutting across the grain, not with it, quarter-inch slices for tenderness, half-inch for heartier plates. From the point, slice thicker or cube for burnt-end vibes. Keep your knife long, sharp, and confident.
Serving suggestions? Warm platter, juices spooned over, pickles and onions for snap, soft rolls, maybe creamy slaw. Offer ends to the bold, lean to the cautious, seconds to everyone.
Common Mistakes and Troubleshooting
If we’re being honest, brisket punishes ego, not effort, so let’s call out the traps before they spring. You want tender slices that bless the table, not apologies with sauce. I’ve burned fingers, pride, and one nice pan, so learn from my singe marks.
1) You rush the stall. Don’t. Ride it out at low heat, keep airflow steady, and wrap when bark sets, not before.
2) You ignore brisket dryness. Fix with a water pan, spritz every hour, and rest in a cooler so juices reabsorb.
3) You miss seasoning balance. Salt early, pepper generously, then taste your rub—sweet, heat, earthy, aligned.
4) You slice wrong. Go against the grain, separate point from flat, adjust thickness.
Still tough? Keep cooking. Dry? Add tallow, slice thinner, serve with au jus.